Setup Guide: Build Your First Network
Overview
Build your first LoRaWAN® network in TEKTELIC KONA Core Network Server. You connect a KONA gateway, create an application, add a TEKTELIC device and see its first uplink. Optionally, you forward decoded data to your own server with an HTTP integration.
Before you start
- Account: a KONA Core account or a trial account.
- KONA gateway: powered on, with internet access.
- TEKTELIC device: with its DevEUI, JoinEUI (AppEUI) and AppKey. These values are delivered with the device.
Steps
Do the steps in this order. KONA Core can only receive the device's uplinks after the gateway is online.
Step 1. Sign in to KONA Core
-
Open the KONA Core address of your region:
Region Address Europe (EU) lorawan-ns-eu.tektelic.com North America (NA) lorawan-ns-na.tektelic.com -
Enter your Username (email) and Password. With a trial account, select Trial Login instead: see Accounts & Trial Access.
-
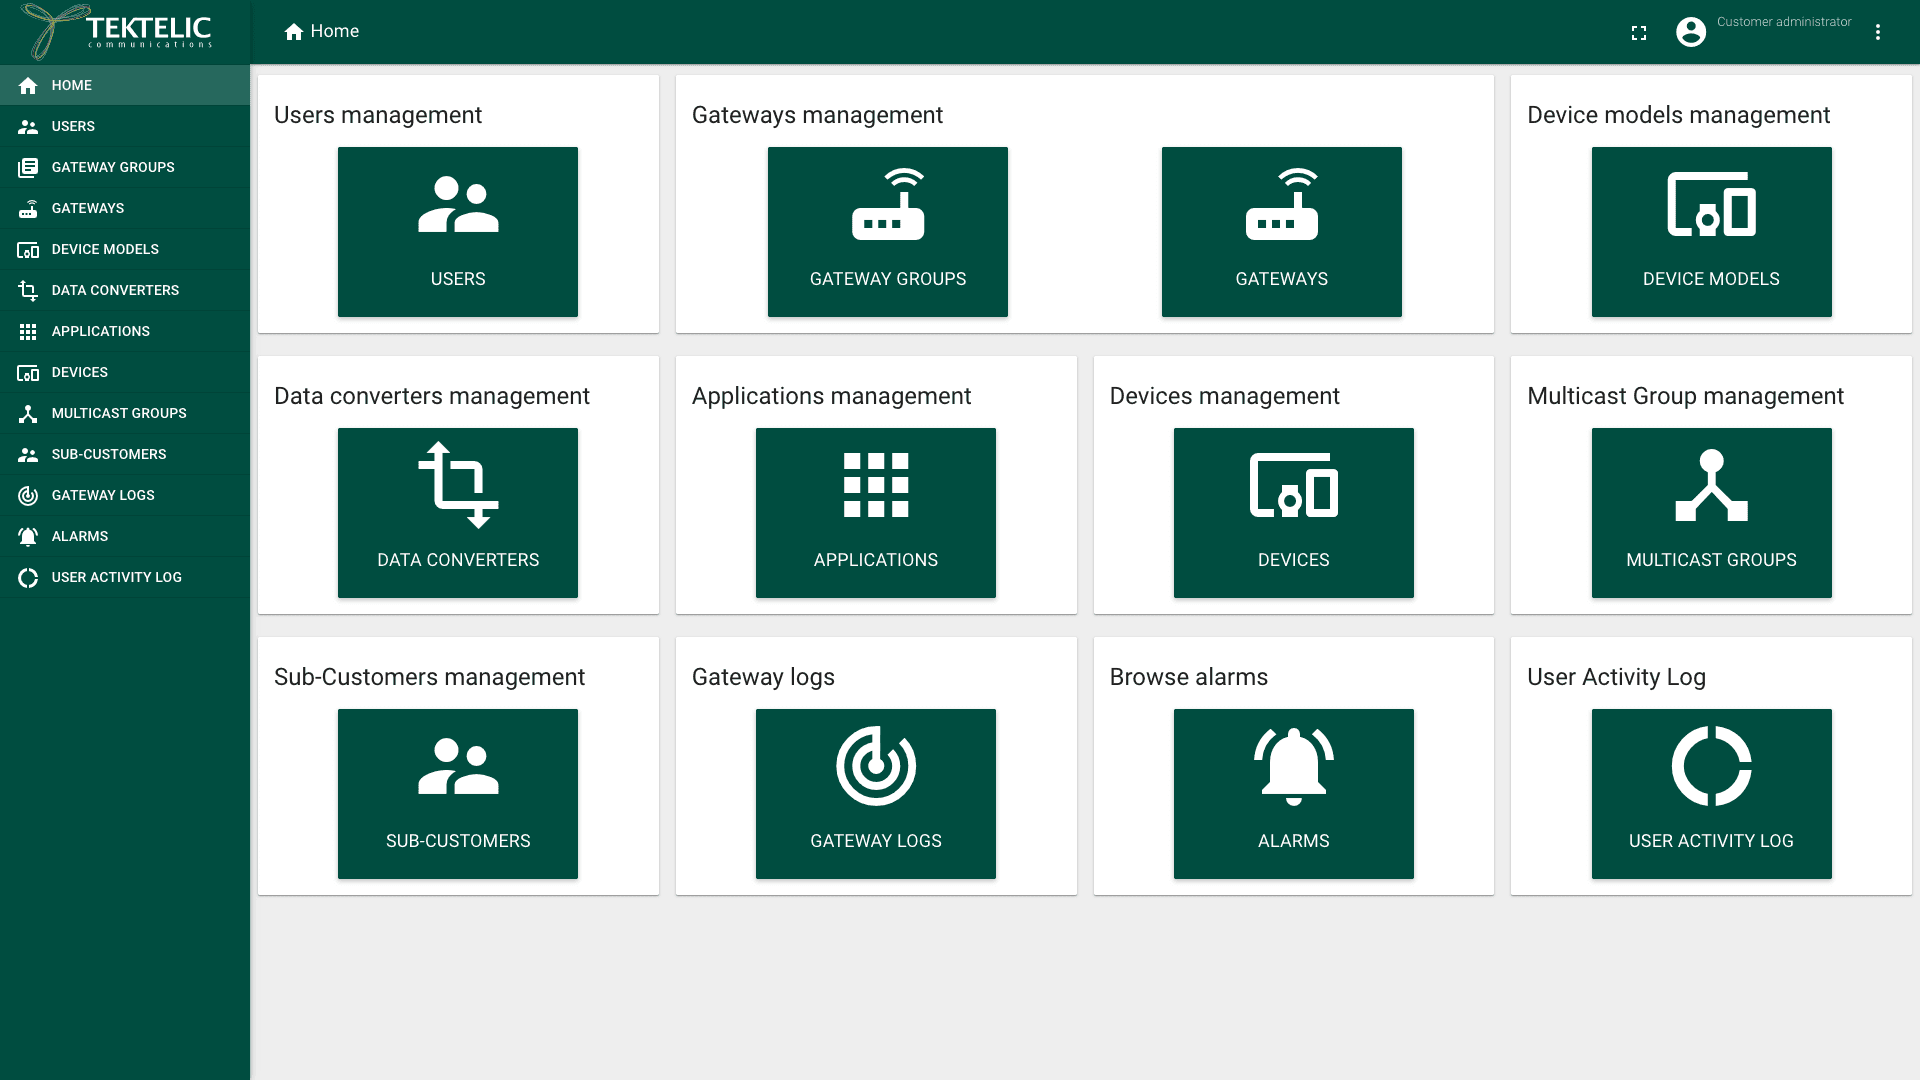
Select Login. The home page opens. Your role shows in the top-right corner, next to the account icon.
Step 2. Add a KONA gateway and connect it
A gateway belongs to a gateway group. Create the group first.
-
In the side menu, select Gateway groups. The Gateway groups page opens.
-
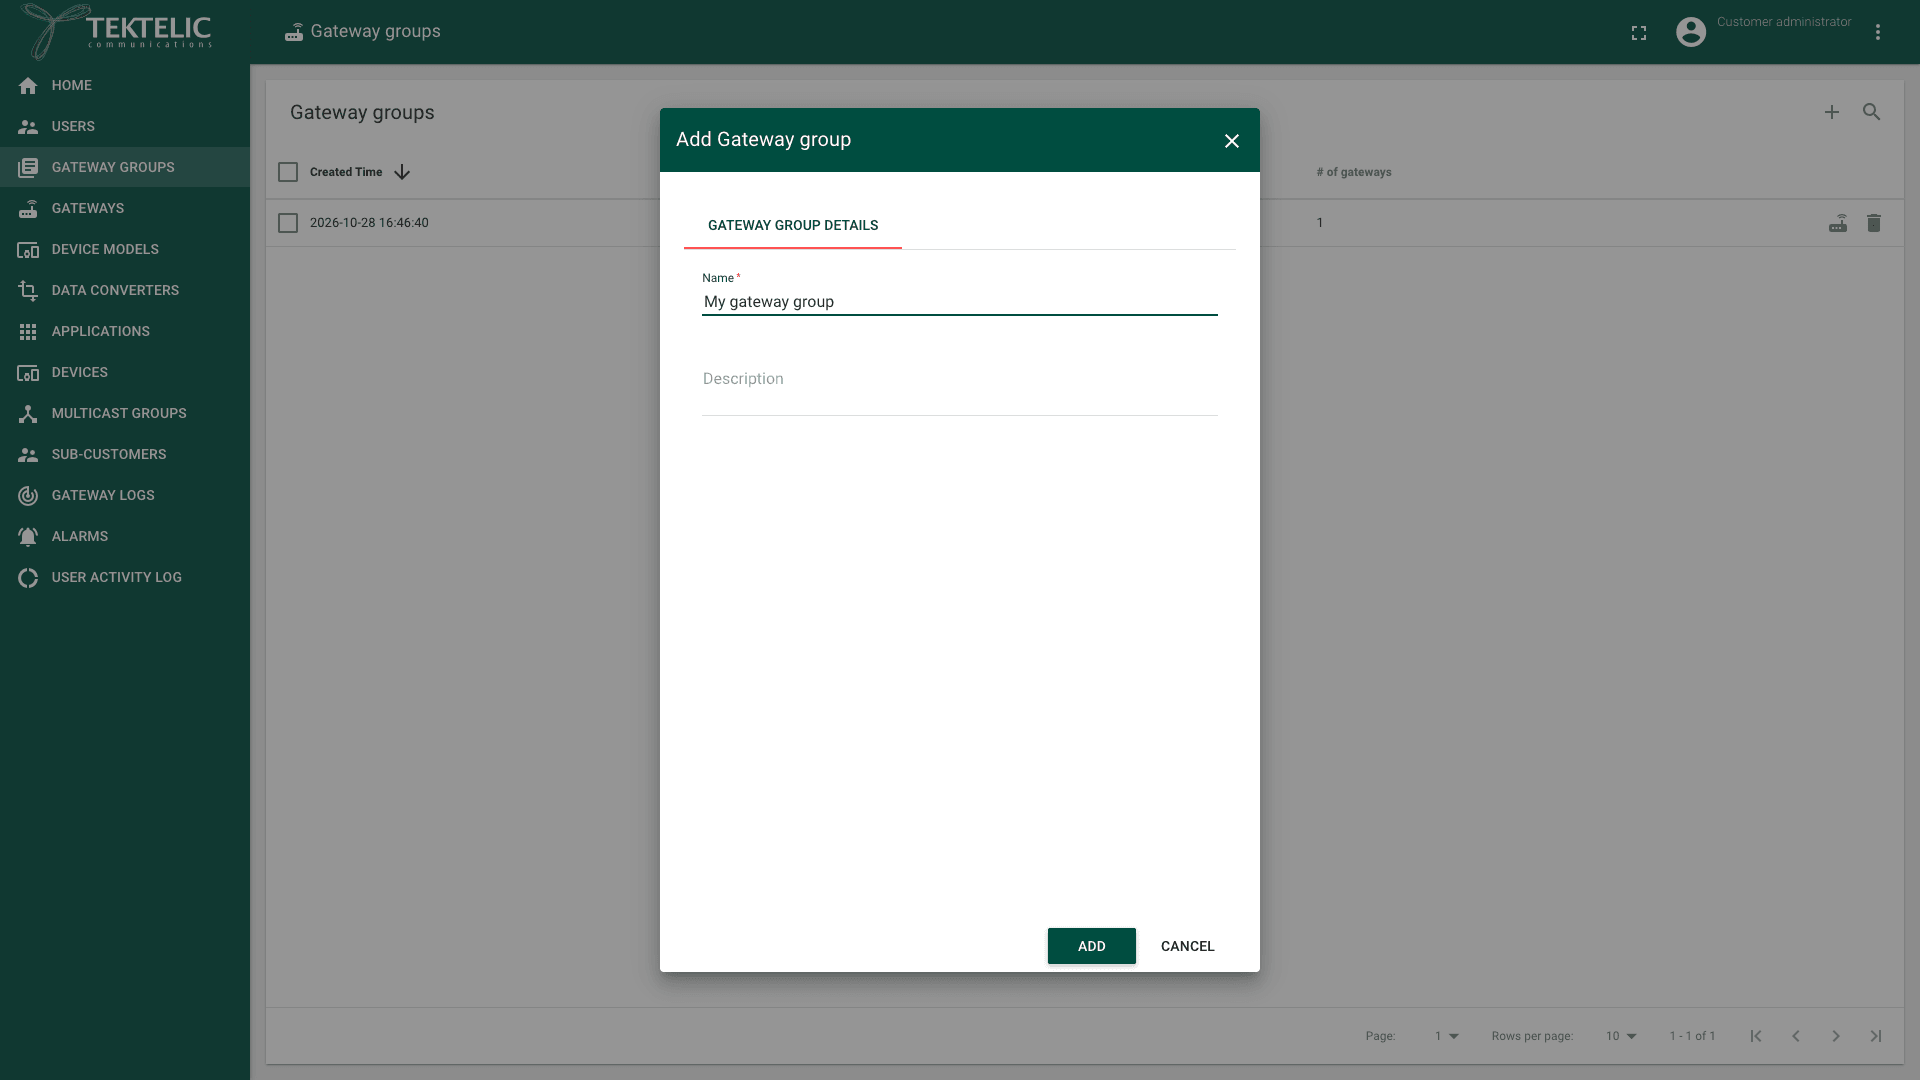
Select Add Gateway group (the + icon). The Add Gateway group dialog opens.
-
Enter a Name. The name is required. Description is optional.
-
Select Add. The new group appears in the list.
-
Select your new group in the list. The Gateway group details panel opens.
-
Select Manage gateways. You can also select the Manage gateways icon in the group's row. The group's gateways page opens, titled with the group name and Gateways.
-
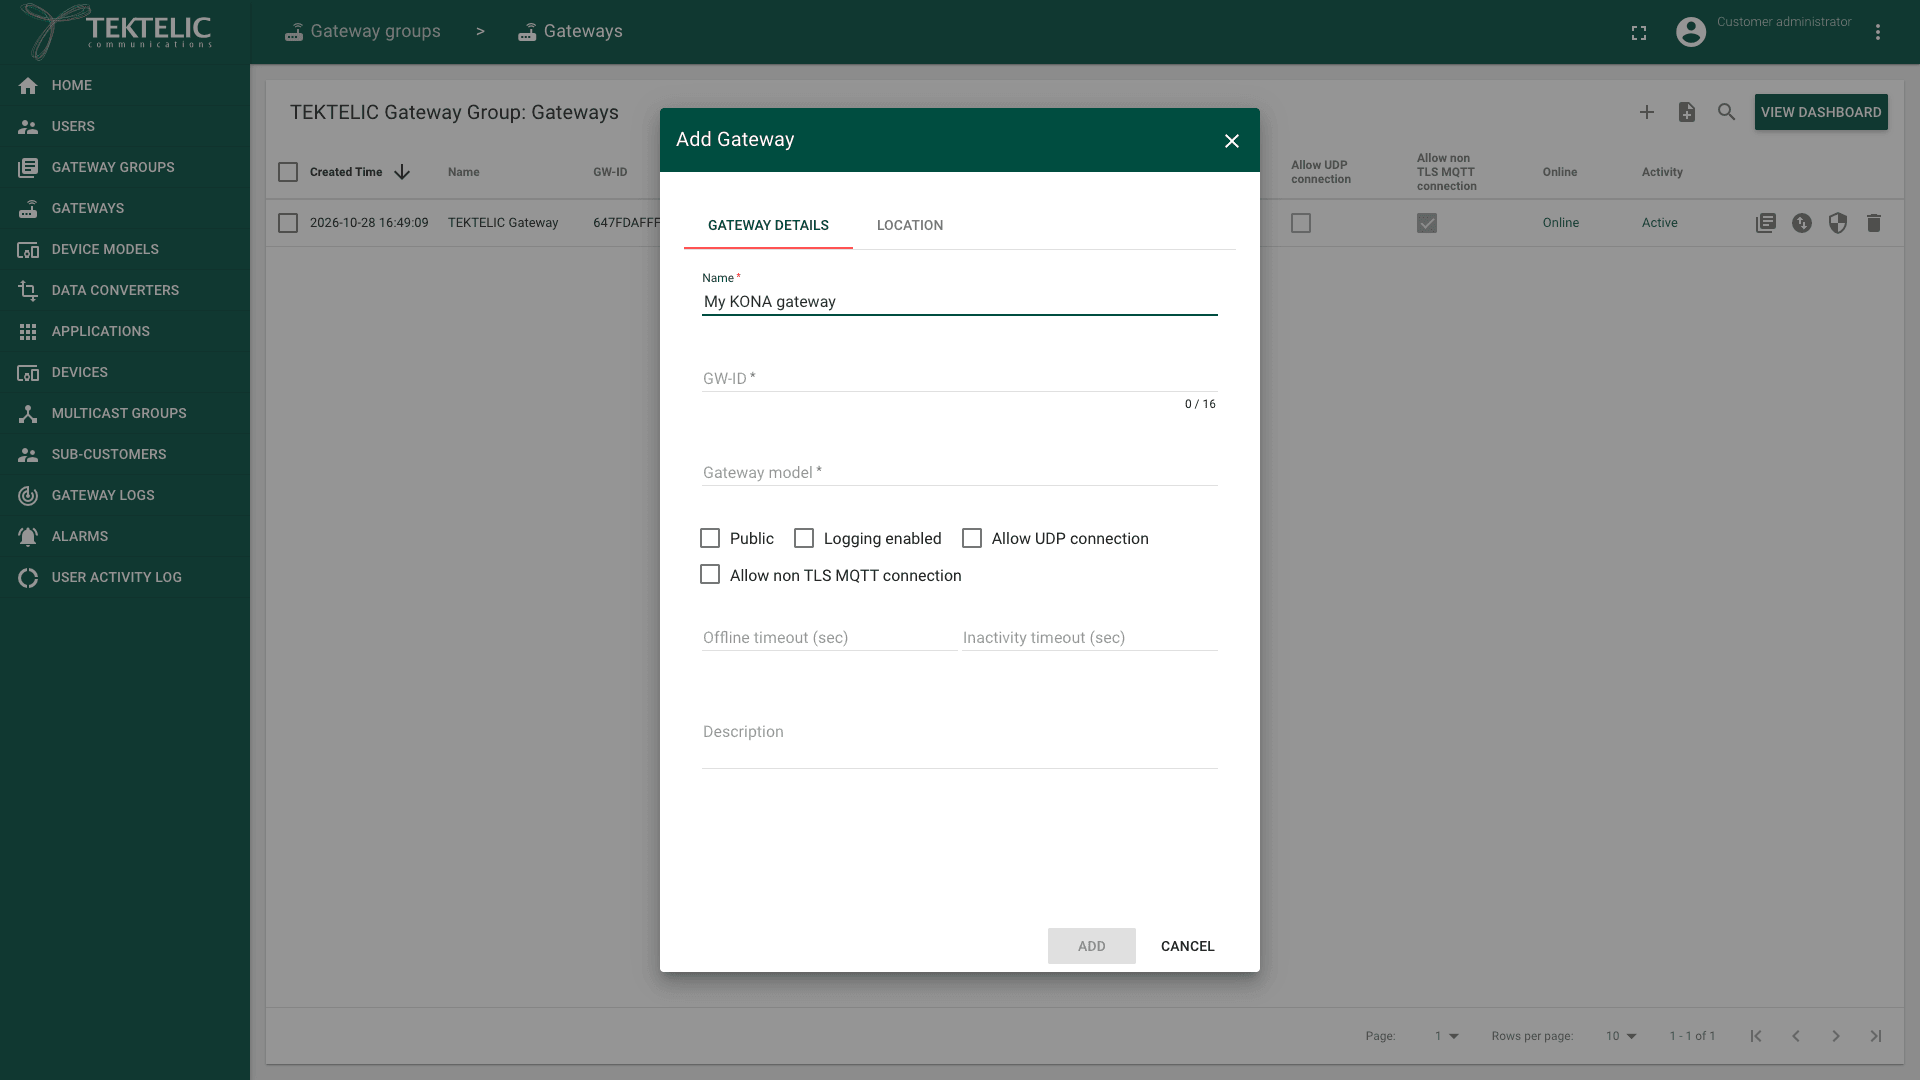
Select Add Gateway (the + icon). The Add Gateway dialog opens.
-
Enter a Name for the gateway.
-
Enter the GW-ID. The GW-ID is 16 characters long and is printed on the gateway's sticker.
-
Select the Gateway model. The model is printed on the gateway's sticker.
-
Select Allow non TLS MQTT connection.
-
Select Add. The gateway appears in the group.
-
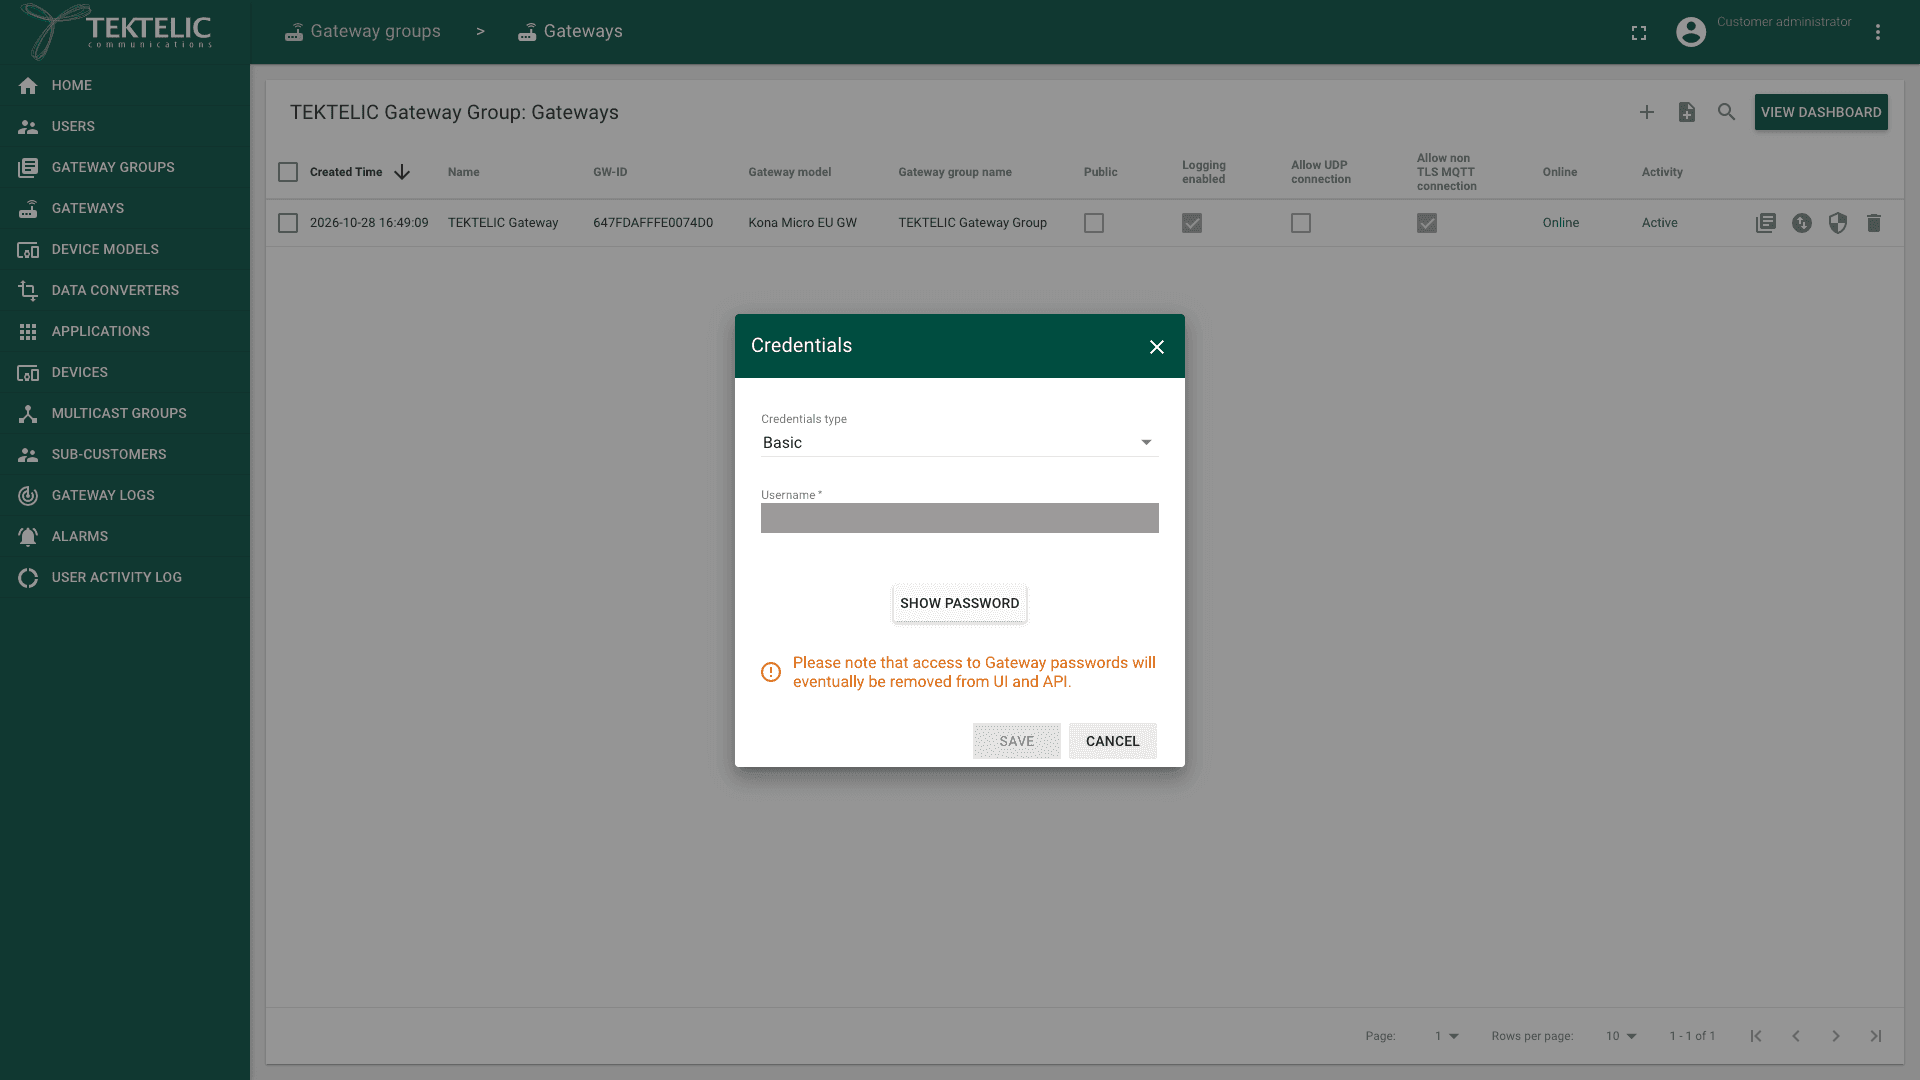
In the gateway's row, select the Manage credentials icon. You can also select the gateway and then Manage credentials in its details panel. The Credentials dialog opens, with Credentials type set to Basic.
-
Select Show password. The Password field appears.
-
In Username, enter the MQTT username supplied with the gateway.
-
In Password, enter the MQTT password supplied with the gateway. These credentials are in its test report sheet. Enter them manually in KONA Core, including for a factory-new gateway.
-
Select Save.
-
In the gateways list, check that Online shows Online and Activity shows Active.

For more ways to watch your gateways, see Monitor Gateways.
Step 3. Create an application
An application groups your devices. Each device belongs to exactly one application.
-
In the side menu, select Applications.
-
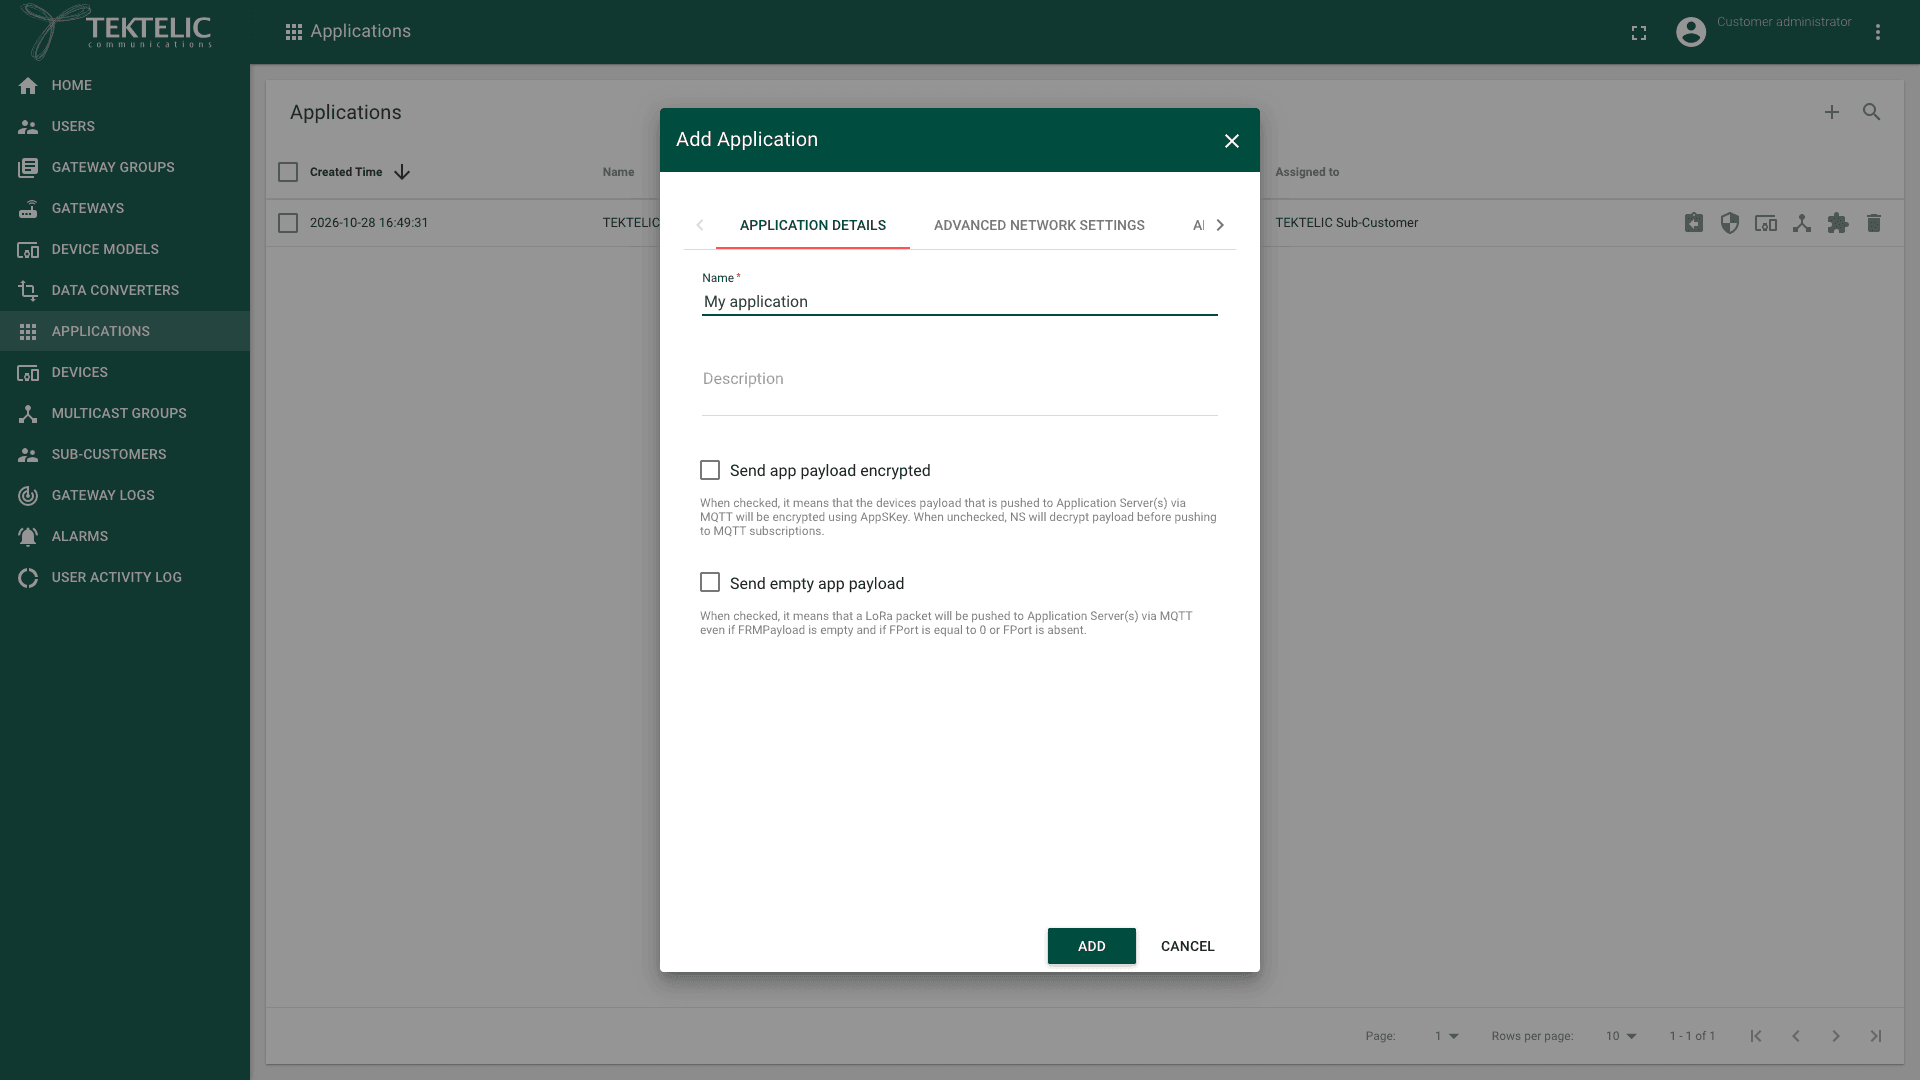
Select Add Application (the + icon). The Add Application dialog opens.
-
Enter a Name. The name is required. Description is optional.
-
Select the Advanced network settings tab.
-
Set the channels for the device's frequency plan:
Frequency plan Setting EU868 In Channel frequency list (MHz), add the additional channels your gateway uses, for example 867.1,867.3,867.5,867.7and867.9.US915 Set Default channel mask to match your gateway's channels: 8-channel, 64-channel or Custom channel mask. The device and gateway must use the same channels. -
Select Add. The new application appears in the list.
For other frequency plans and channel settings, see Network Settings. For application settings, see Manage Applications.
Step 4. Add a TEKTELIC device and see its first uplink
Add the device with its Application Key. The device then joins the network with OTAA activation.
-
In the side menu, select Applications.
-
In your application's row, select the Manage devices icon. You can also select the application and then Manage devices in its details panel. The application's devices page opens, titled with the application name and Devices.
-
Select Add Device (the + icon). The Add Device dialog opens. You can't add a device from the Devices page in the side menu.
-
Enter a Name for the device.
-
Select the Device model of your TEKTELIC device.
-
Enter the Device EUI. This is the device's DevEUI, a globally unique 64-bit ID.
-
Enter the Application EUI. This is the device's JoinEUI (AppEUI).
-
Enter the Application Key. This is the device's AppKey, the secret key it uses to join the network.
-
Select Use application settings so the device uses the regional channel settings from step 3.
-
Select Add. The device appears in the application with the status Offline. This is expected until the device joins and sends its first uplink.
-
Activate the device near the gateway using the activation procedure for your specific device model.
-
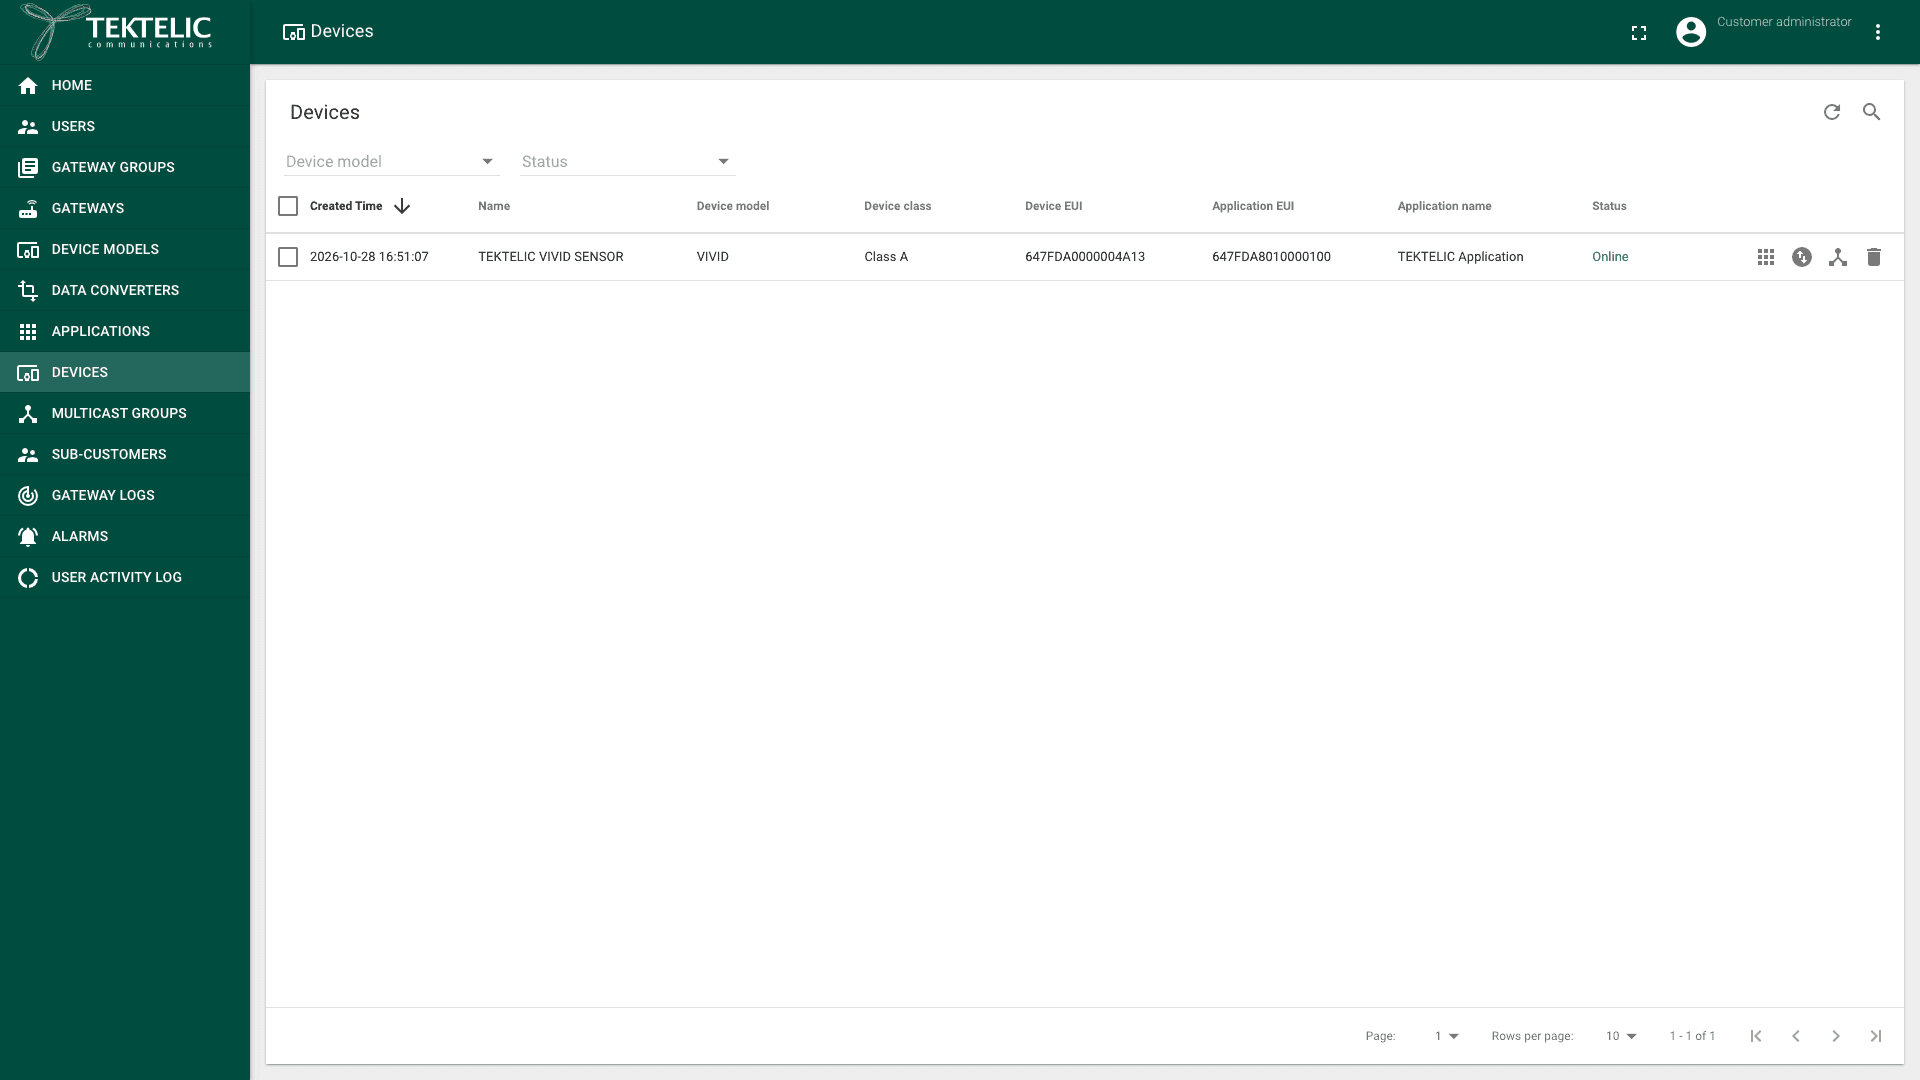
In the side menu, select Devices.
-
In the list, check that your device's Status changes to Online. The first uplink usually arrives within 1 minute of power-on.
-
Select the device's name in the list. The Device details panel opens.
-
Select the Real-time packets tab. It lists the device's packets for the last day. Each uplink shows Uplink in the Message Type column, the Gateway that received it, and the raw Payload.
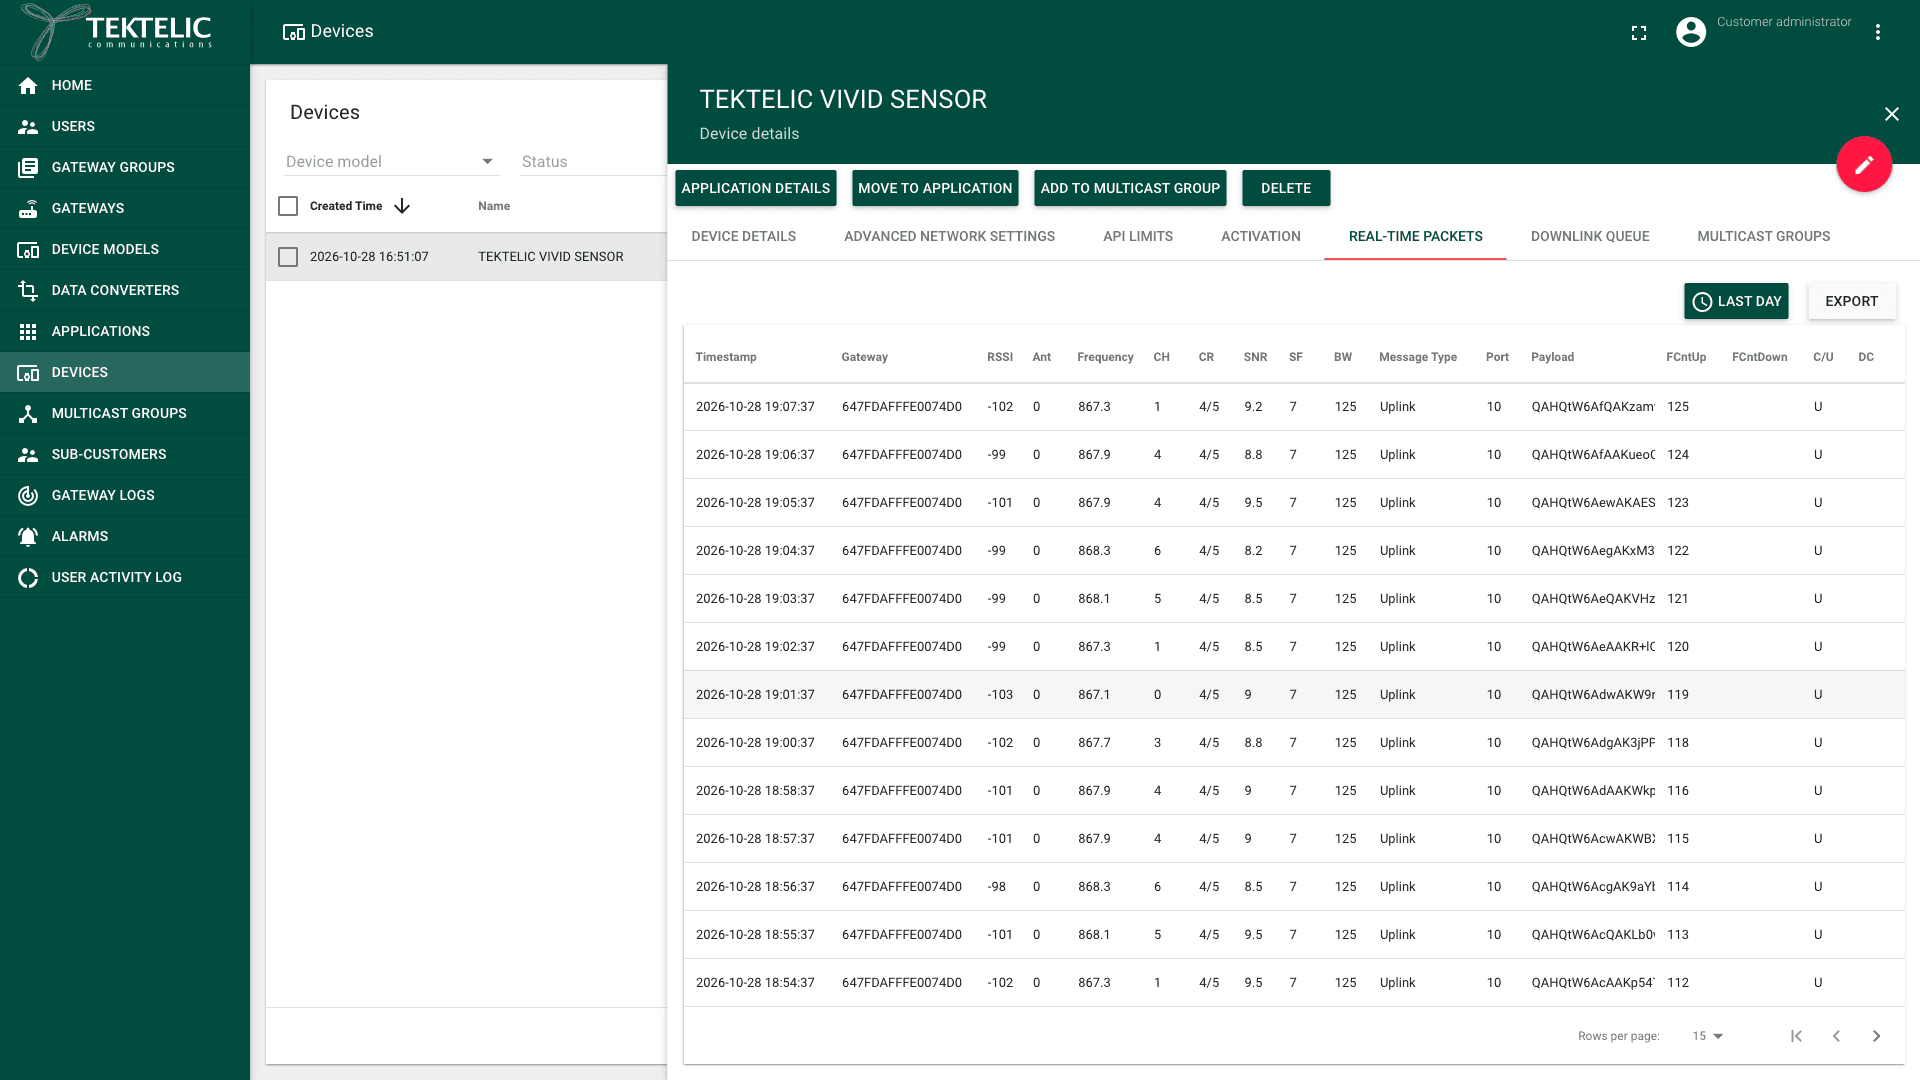
The Real-time packets tab shows the raw payload. To receive decoded values, such as temperature readings, continue to step 5 to set up a data converter and an integration.
Step 5 (optional). Forward data with an HTTP integration
Use an HTTP_V2 integration to send device data to your server. Its data converter turns payload bytes into readable values, such as temperature readings.
-
In the side menu, select Applications.
-
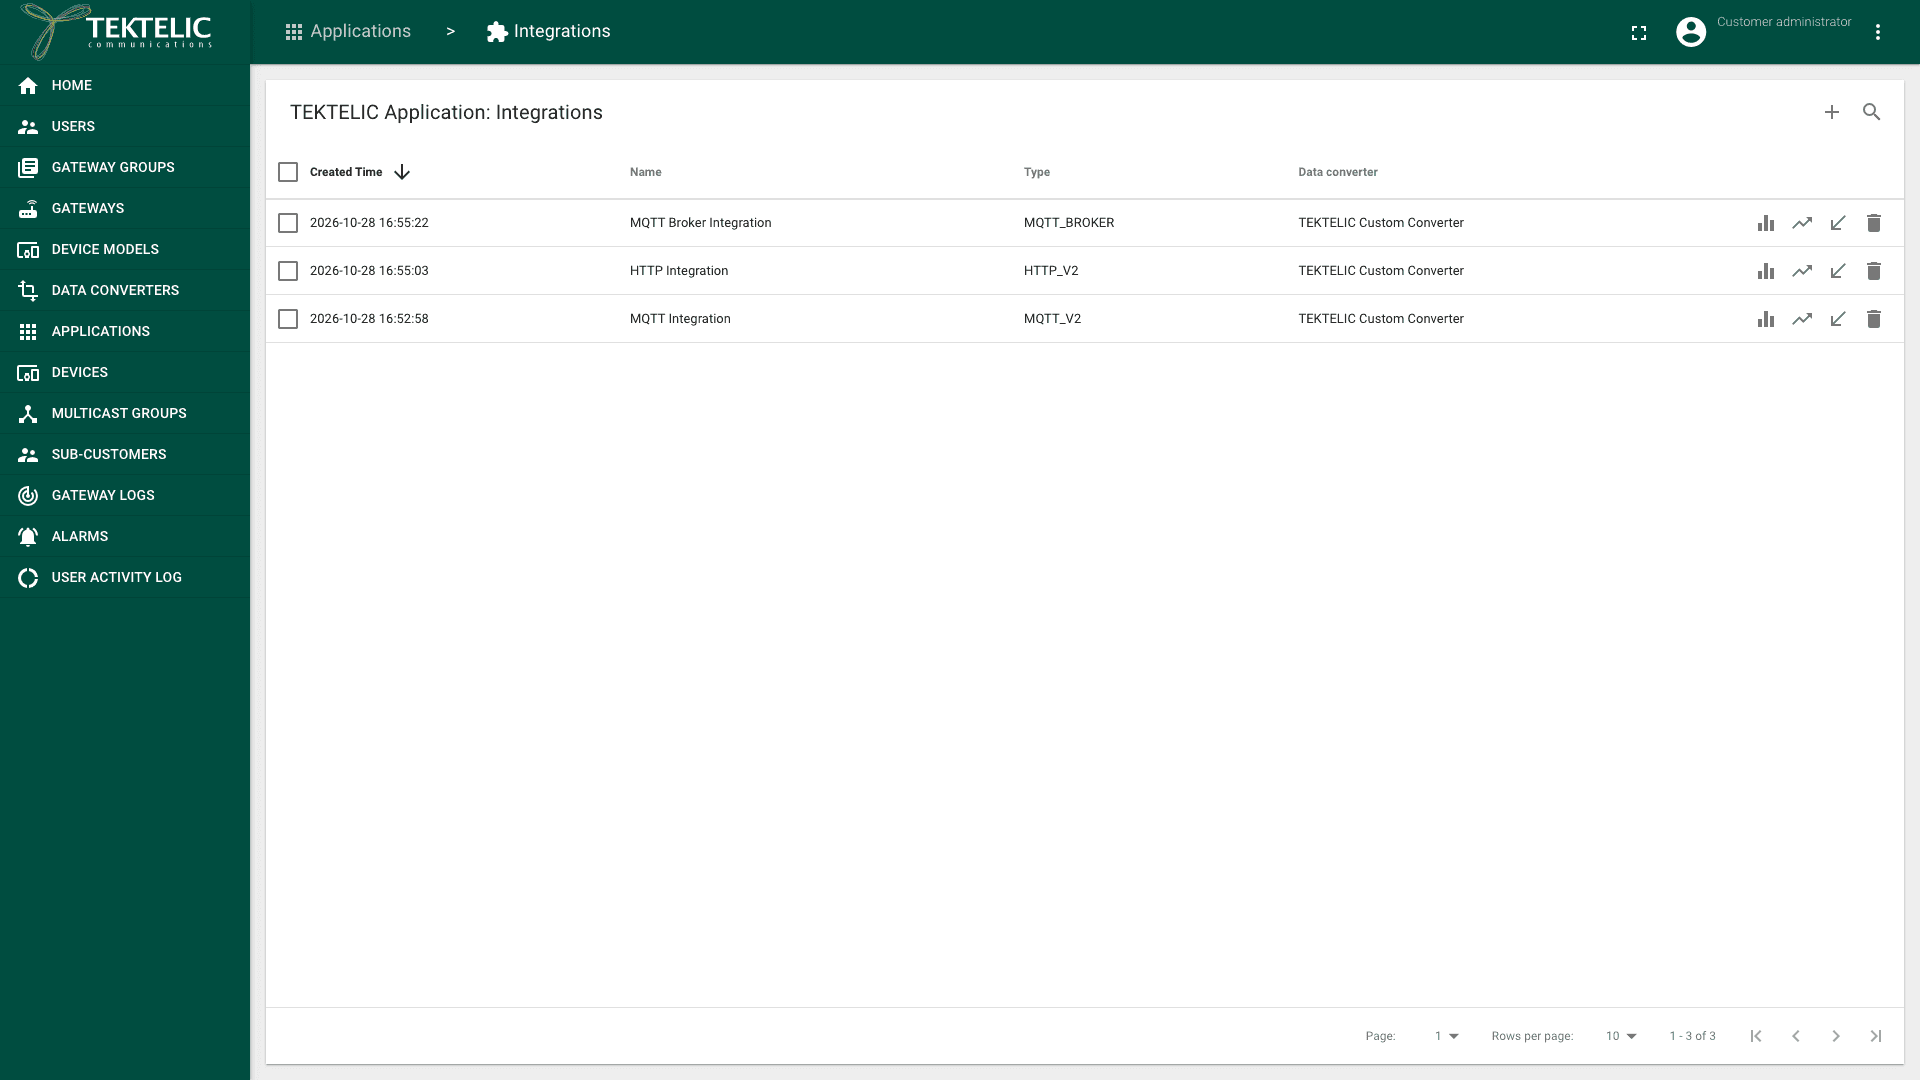
In your application's row, select the Manage integrations icon. You can also select the application and then Manage integrations in its details panel. The application's integrations page opens, titled with the application name and Integrations.
-
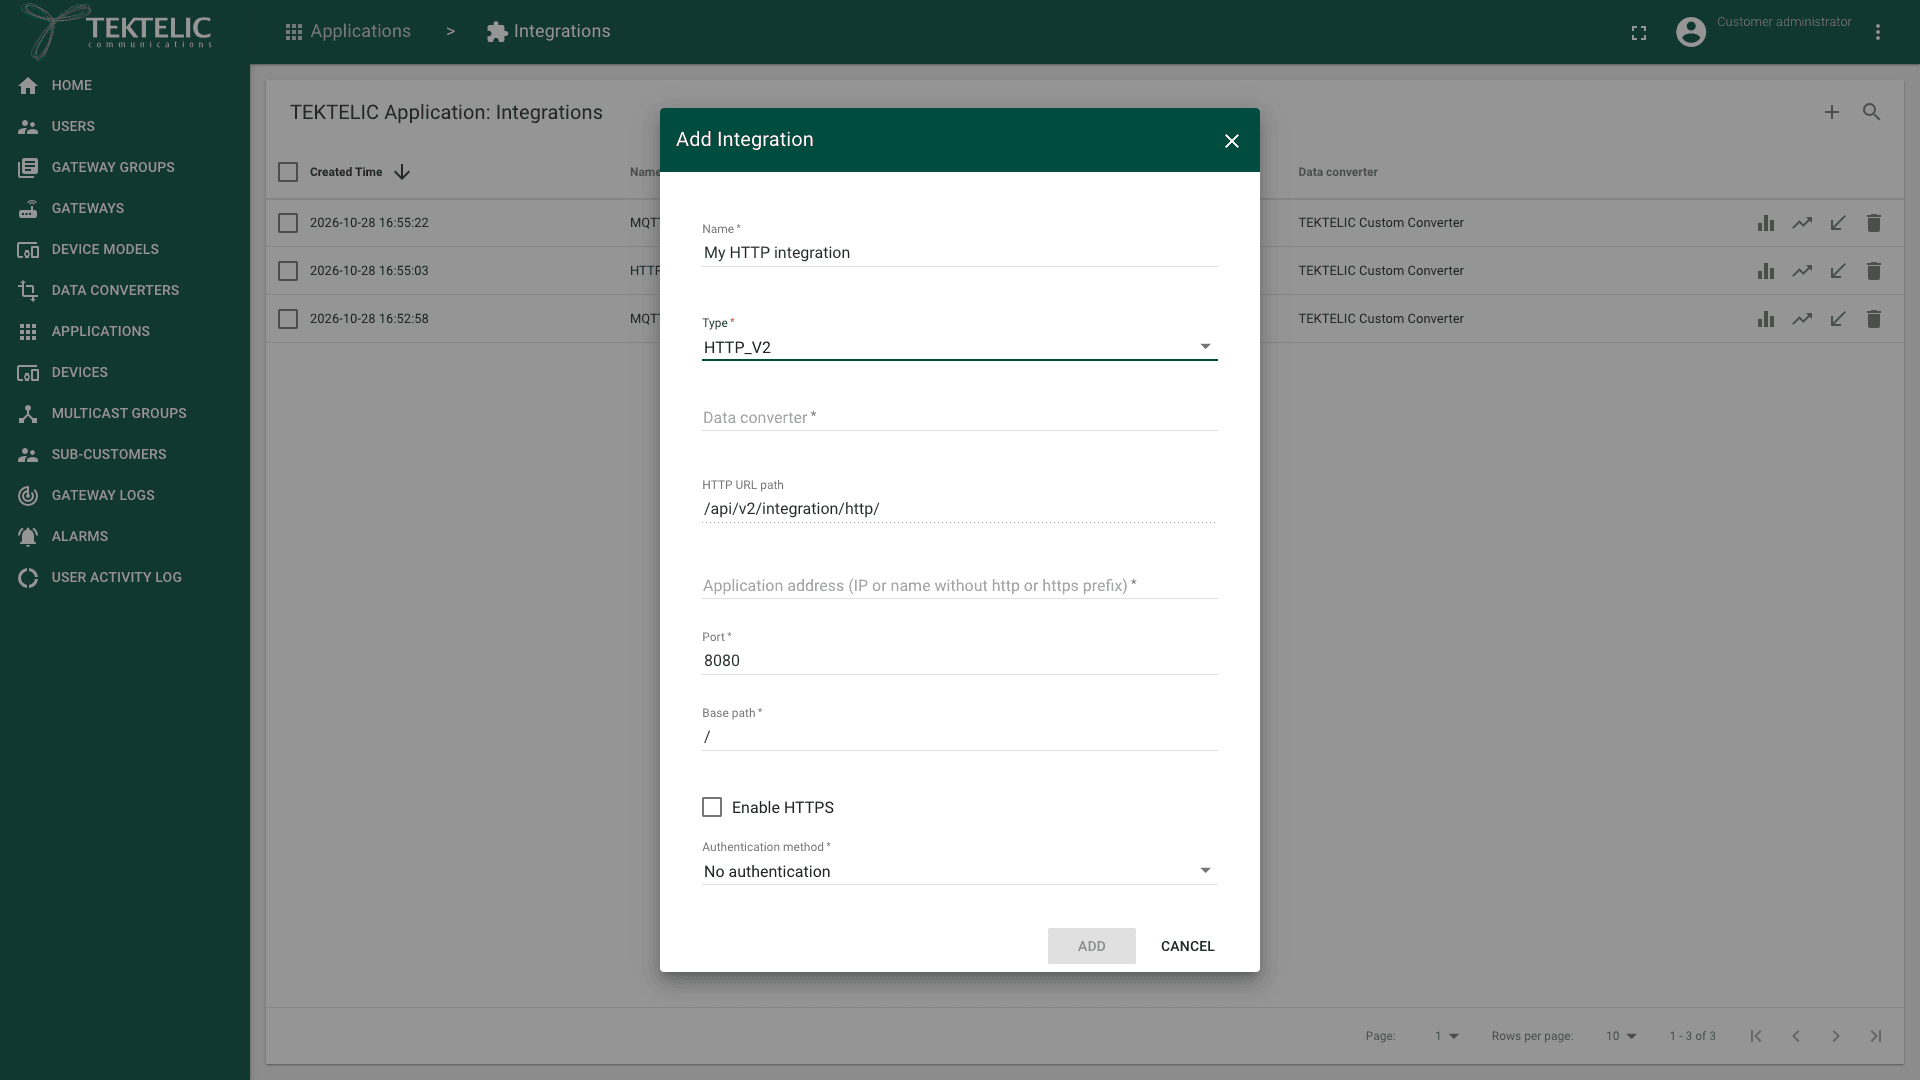
Select Add Integration (the + icon). The Add Integration dialog opens.
-
Enter a unique Name.
-
In Type, select HTTP_V2.
-
In Data converter, select a Custom v2 converter for your device. Use the latest code for your device model and payload format from the TEKTELIC GitHub repository. To create the converter, see TEKTELIC Device Converters Library.
-
Enter the Application address (IP or name without http or https prefix): the IP address or domain name of your server.
-
Enter the Port your server uses for HTTP. The default is
8080. -
Enter the Base path of your endpoint on that server. The default is
/. -
Select Enable HTTPS if your server uses TLS. We recommend HTTPS.
-
Select Add. KONA Core adds a routing key to the HTTP URL path of the integration. Your system uses this path to send downlinks to KONA Core.
Keep the other settings at their defaults. They are described in HTTP Integration.
Check the result
Allow up to 1 minute for the gateway to show Online. The gateway states mean:
| State | Meaning |
|---|---|
| Online | The gateway's MQTT connection responds to keep-alive pings. |
| Active | The gateway has transferred data within its configured Inactivity timeout (sec). |
Your network works when all of these are true:
- Gateway: the gateway shows Online and Active.
- Device: on the Devices page, the device shows Online.
- Data: the device's Real-time packets tab shows at least one Uplink.
- Integration (step 5): your server receives device data in a JSON body, with metadata such as
deviceEuianddeviceName.
Troubleshooting
| Symptom | Likely cause | What to do |
|---|---|---|
| The gateway stays offline. | The gateway has no power or internet connection. | Check the power cable and the gateway's LEDs. For Ethernet, reconnect the cable and check the port LEDs. For cellular, check that the SIM is installed and its data service is active. |
| The device stays Offline. | The gateway is offline. Or the Device EUI, Application EUI or Application Key is wrong. Or the device and gateway use different frequency plans. | Check that the gateway is Online. Compare the keys with the values delivered with the device. See Onboard a TEKTELIC Device. |
| Add fails when you add a gateway, device or integration. | Your subscription plan's limit for this entity is reached, or the device or gateway is already registered in KONA Core. | Contact TEKTELIC Support. |
Still stuck? A Sub-Customer contacts their Customer, a Customer contacts their Provider, and a Provider contacts TEKTELIC Support. Send the GW-ID and the DevEUI, the time in UTC, the exact error message and a screenshot.
Related
- Onboard a KONA Gateway via MQTT
- Manage Gateway Groups
- Manage Applications
- Onboard a TEKTELIC Device
- Device Activity & Status
- TEKTELIC Device Converters Library
- HTTP Integration
- Accounts & Trial Access
- Glossary
- API Reference: to do the same from your own systems, use Save gateway, Save application, Save device and Save integration.