Pass-Through Converter
Overview
Forward the payload of each uplink to your system as it is, without decoding it in TEKTELIC KONA Core Network Server. You create a Custom v2 data converter whose decoder passes on the bytes and the FPort, and you select it in an integration. Your system then gets the bytes in the integration's message and decodes them itself.
Use a pass-through converter when:
- Your system already decodes the payloads of your devices, for example with the device manufacturer's decoder.
- You add a device whose payload format you don't know yet, and you want to see its bytes in your system.
- You keep the raw bytes for later processing.
When KONA Core should deliver readable values, write a decoder instead: see Write a Decoder. For how converters work, see Payload Converters Overview.
Before you start
- Role: Customer administrator or Sub-Customer administrator. A Customer user opens converters read-only. See Users, Roles & Permissions.
- Application: an application with at least one device that sends uplinks. See Manage Applications.
- Integration type: this guide uses a V2 integration: HTTP_V2, MQTT_V2 or MQTT_BROKER. For a legacy V1 integration, see the note after the steps.
- Your system: an HTTP server or MQTT client that receives the integration's messages. See HTTP Integration, MQTT Integration or MQTT Broker Integration.
Steps
Create the converter
-
In the side menu, select Data converters.
-
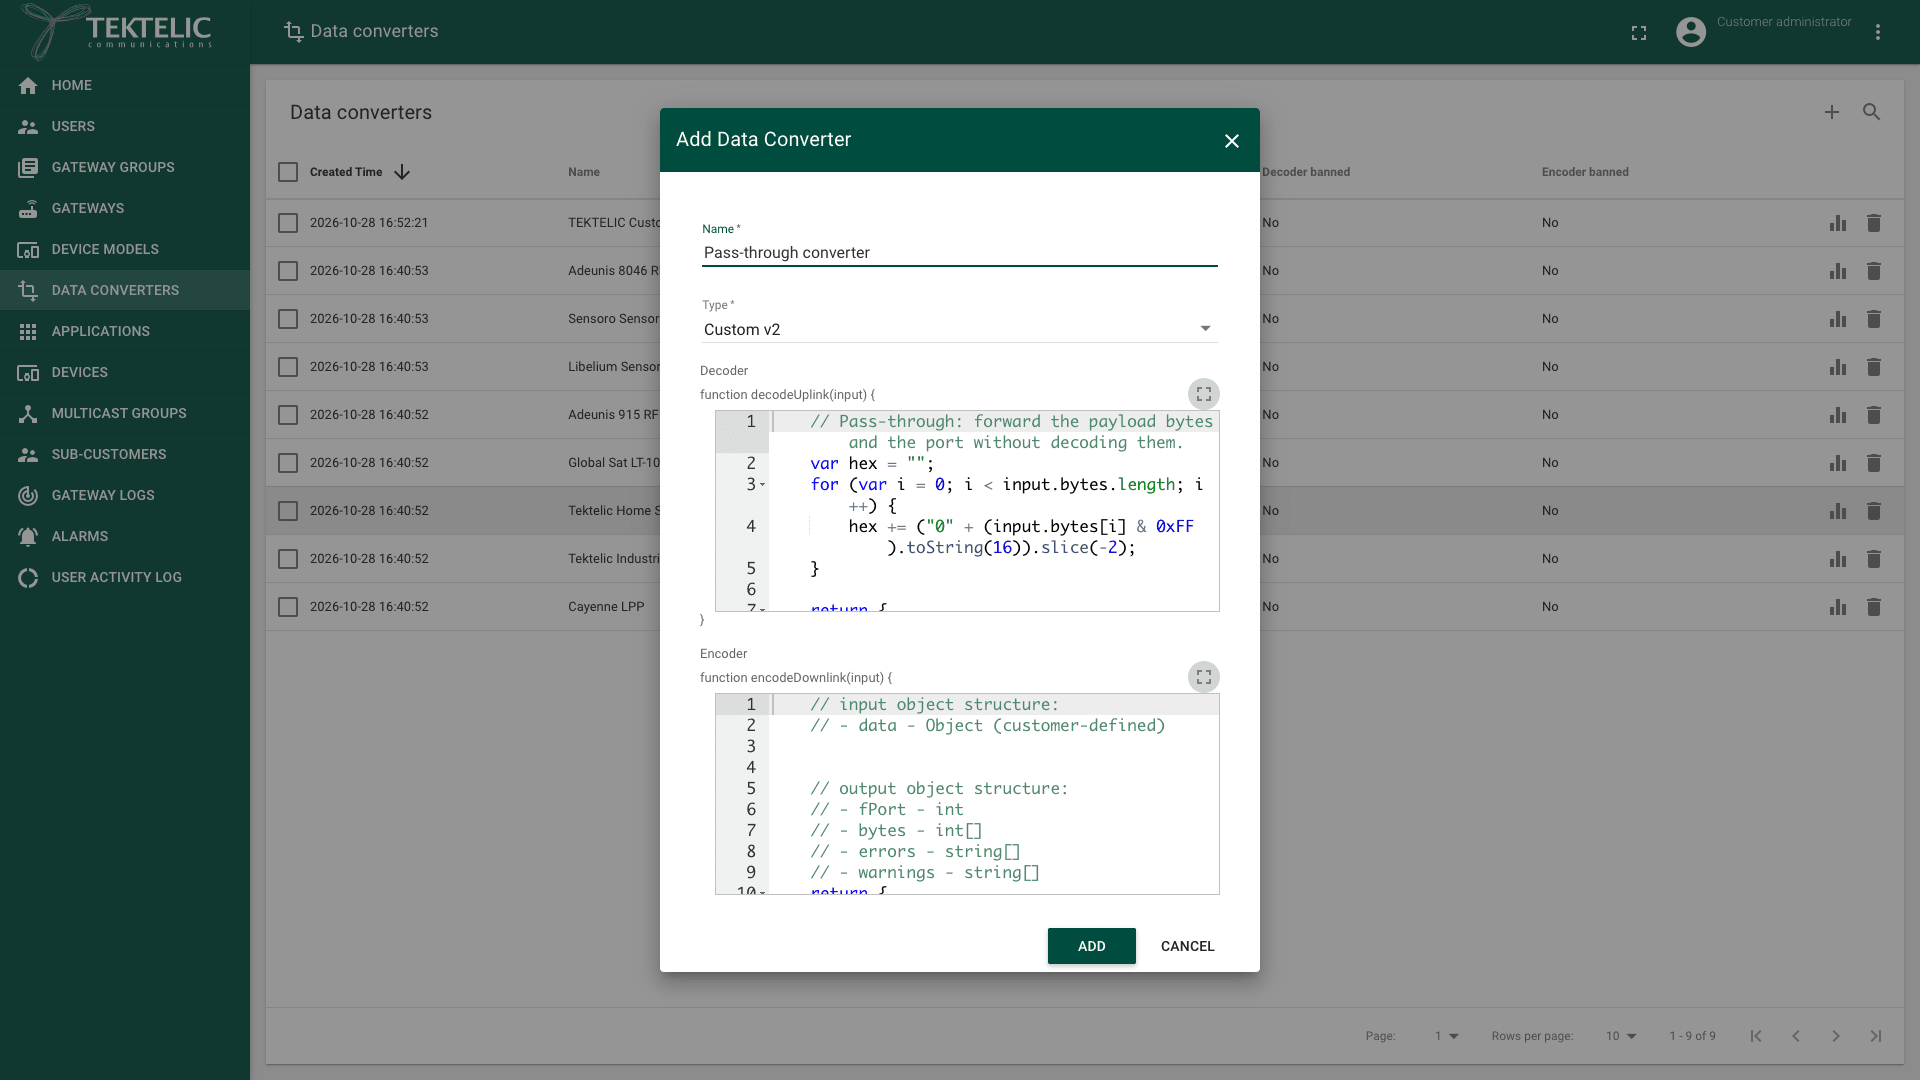
Select + at the top right. The Add Data Converter dialog opens.
-
In Name, enter a name, for example
Pass-through converter. -
In Type, select Custom v2. The Decoder and Encoder editors appear with default code.
-
In Decoder, replace the default code with this function body. The editor already shows the line
function decodeUplink(input) {and the closing brace, so don't type them.// Pass-through: forward the payload bytes and the port without decoding them.var hex = "";for (var i = 0; i < input.bytes.length; i++) {hex += ("0" + (input.bytes[i] & 0xFF).toString(16)).slice(-2);}return {"data": {"fPort": input.fPort,"bytes": input.bytes,"hex": hex},"errors": [],"warnings": [],"tektelicMetadata": input.tektelicMetadata};The decoder returns the port, the bytes as an array of numbers and the same bytes as a hex string. Keep only the fields your system reads.
-
Optional: to send raw downlinks through the integration too, replace the default code in Encoder with this function body:
// Pass-through: send the bytes and the port that your system provides.return {"fPort": input.data.fPort,"bytes": input.data.bytes,"errors": [],"warnings": []};Your system then sends the downlink data as an object with
fPortandbytes, for example{"fPort": 10, "bytes": [1, 2, 3]}. Put this object in the V2 downlink message'sdatafield. See Message Formats. The default encoder returns port 0 with no bytes, so replace it if you plan to send downlinks. -
Select Add. The converter appears on Data converters with the type Custom v2.
Select the converter in an integration
-
In the side menu, select Applications.
-
In your application's row, select the Manage integrations icon. The application's integrations page opens.
-
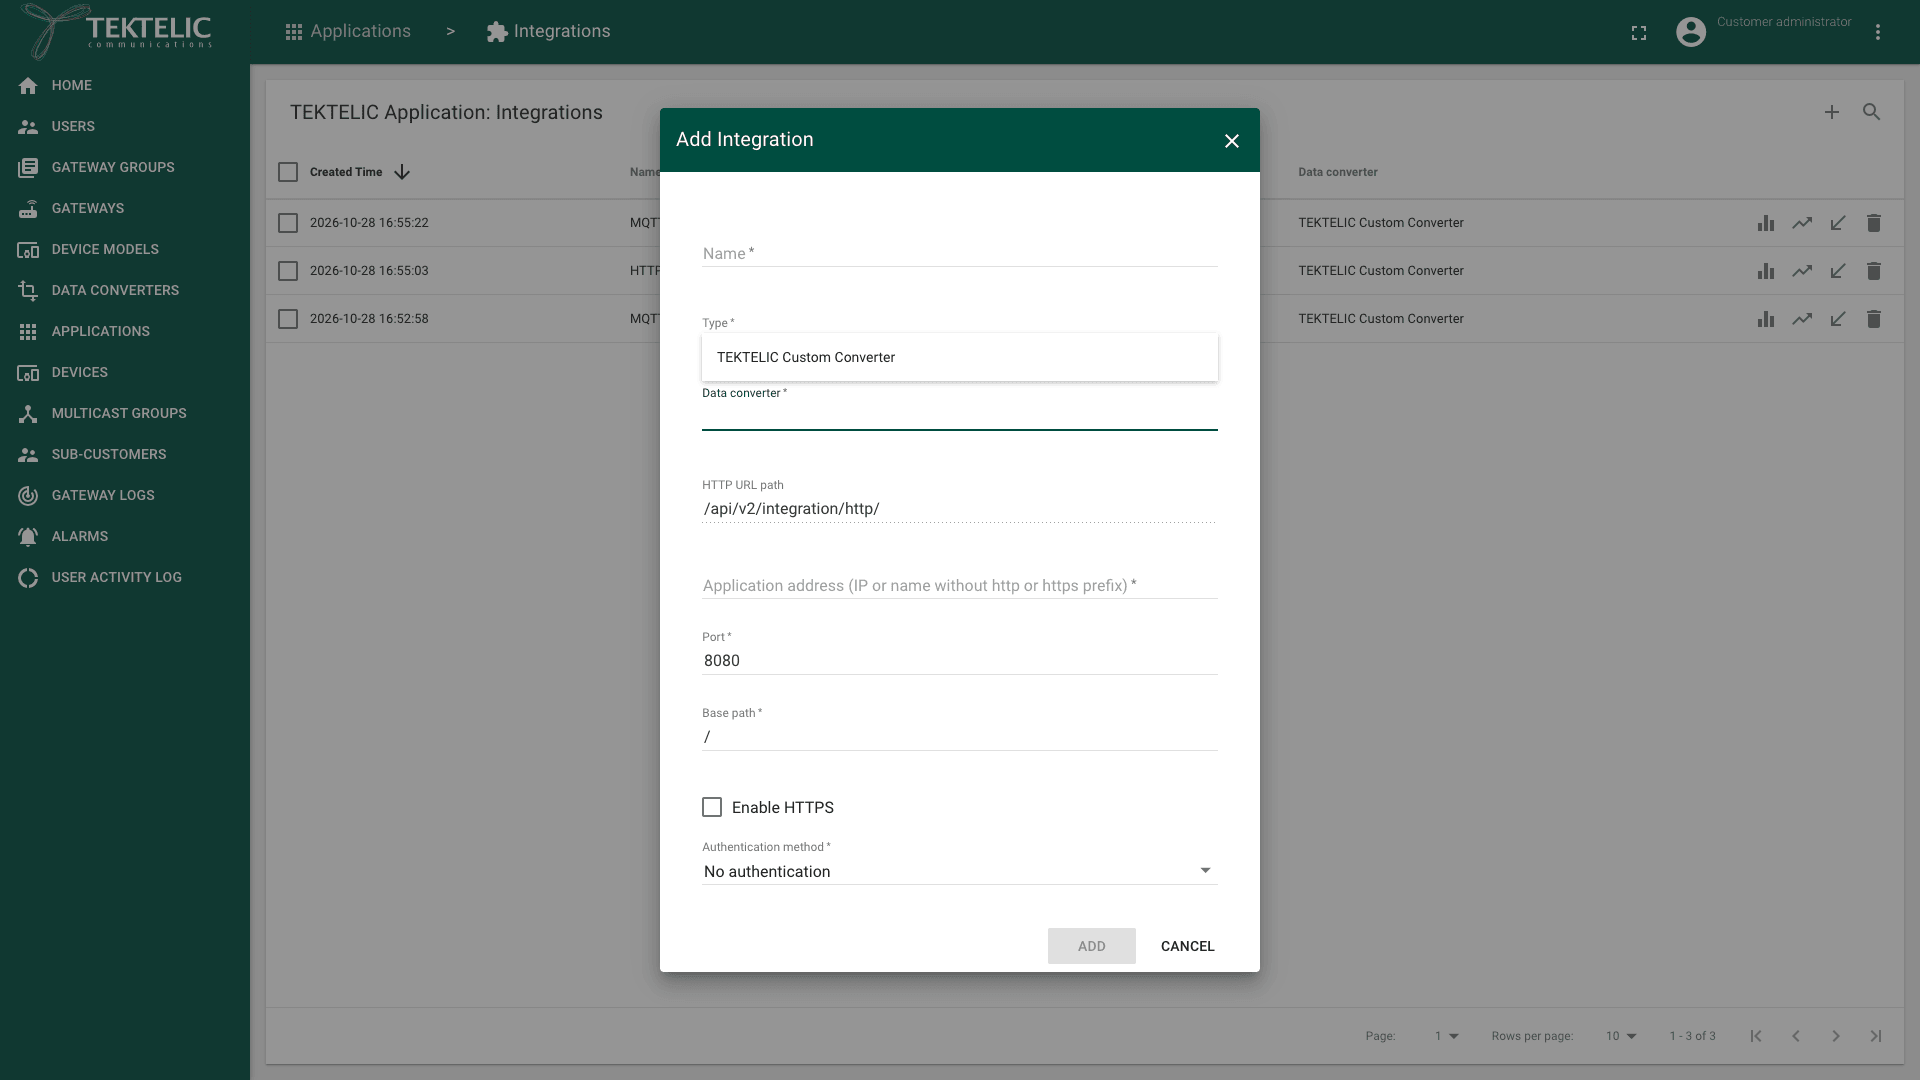
Select + at the top right. The Add Integration dialog opens. To change an existing integration instead, open it and select the pencil icon (Toggle edit mode).
-
In Type, select a V2 type. We recommend MQTT_BROKER when you have no preference: you host nothing, and KONA Core creates the credentials and topics. Select HTTP_V2 for a web service, or MQTT_V2 for your own MQTT broker. See Which type to choose.
-
In Data converter, select your pass-through converter. The list shows only Custom v2 converters.
-
Fill in the connection fields of the integration type. See MQTT Broker Integration, HTTP Integration or MQTT Integration.
-
Under Allow messages with ports, select Allow all ports to forward the uplinks of every port, or enter only the ports your system needs.
-
Select Add. To change an existing integration, select the check mark icon (Apply changes) instead.
For a legacy V1 integration (HTTP or MQTT), use a converter of the type Custom. Its default decoder already forwards the payload: its first line reads // Do not decode anything, just put it into AS as is. It returns bytes (the bytes as a JSON string), port and payload length. We recommend a V2 integration for new setups: see Migrate from V1 to V2.
Check the result
Wait for the next uplink of a device in the application, then check:
- Your system: the integration's message holds
fPort,bytesandhexfrom this guide's decoder. KONA Core merges the decoder'sdataandtektelicMetadatainto the delivered body. To receive the raw bytes, include them in your decoder output. See Message Formats. - The device's Real-time packets tab: the Payload of the same uplink matches the bytes your system received. confirm the encoding of the Payload column, for example hex or Base64.
- Data converters > Show converter statistics for your converter: Invoked for Decoder grows with each uplink, and Invocation failed (total) stays at 0. See Usage Statistics & Reports.
If your system receives nothing within two uplinks of the device, see Troubleshooting.
Troubleshooting
| Symptom | Likely cause | What to do |
|---|---|---|
| Your converter isn't in the integration's Data converter list. | The converter type doesn't fit the integration type. V2 integrations list only Custom v2 converters. | Create the converter with the type Custom v2, or use the Custom type with a V1 integration. |
| Uplinks show in Real-time packets, but your system receives nothing. | The integration's filters skip the uplink, or the integration can't reach your system. | Check Allow messages with ports and Send empty payload. Check the integration's statistics: see Integration Monitoring. |
Decoder banned shows Yes, or the event INTEGRATION_UL_DECODING_FAILURE appears. | The decoder throws an error or runs longer than 100 ms. If it exceeds the timeout 5 times within 600 seconds, KONA Core bans it for 30 minutes. | Compare your code with the code in step 5. Check that the function body has no function decodeUplink(input) { line of its own. See Payload Converters Overview. |
Still stuck? A Sub-Customer contacts their Customer, a Customer contacts their Provider, and a Provider contacts TEKTELIC Support. Send the DevEUI, the integration and converter names, the time in UTC, the exact error message and a screenshot.
Related
- Payload Converters Overview
- Write a Decoder
- Write an Encoder
- Message Formats
- HTTP Integration
- MQTT Integration
- MQTT Broker Integration
- Integration Monitoring
- Glossary
- API Reference: to create the converter from your own system, use Save converter.