Multicast Groups
Overview
Send one downlink to many LoRaWAN® devices at once with a multicast group in TEKTELIC KONA Core Network Server. You create the group in an application, add devices to it, and add the downlink to the group's queue instead of to each device's queue. Use it for commands that many devices need at the same time, for example a configuration change for all street lights.
A multicast group acts like one shared device:
- Identity: it has its own Multicast Group EUI and its own Device address, the group's DevAddr.
- Keys: it has its own Network session key and Application session key, the group's session keys. All devices in the group use them to receive the group's downlinks.
- Application: it belongs to one application.
Device classes. In LoRaWAN, a device receives a multicast downlink only while it listens outside its own uplinks. It does so in Class B ping slots or in Class C continuous receive. A Class A device opens receive windows only after its own uplink, so it can't receive multicast downlinks. The group settings in KONA Core set the RXC receive window, the Class C window. Use Class C devices for multicast. confirm whether KONA Core sends multicast downlinks to Class B devices in ping slots, and what it does with a Class A device in a group. For the classes, see Device Activation & Classes.
To send a downlink to a single device, see Send Downlinks.
Before you start
- Role: Customer administrator or Sub-Customer administrator. A Customer user opens the Multicast Groups page read-only, and a Sub-Customer user doesn't see it. See Users, Roles & Permissions.
- Application: with the devices you want to reach. See Manage Applications.
- Devices: Class C devices that are added to KONA Core and joined. The device model sets the class: check the Device class column on the Devices page.
- Multicast session on the devices: each device must know the group's Device address, Network session key and Application session key. KONA Core stores these values for the group, and you set the same values on every device. confirm how to set the multicast address and keys on a TEKTELIC device, for example with a configuration downlink, and link the guide.
- Device EUIs: the DevEUI of each device you add. For many devices, a CSV file with one DevEUI per row.
Steps
Step 1. Create a multicast group
You create a multicast group from its application. The Multicast Groups page in the side menu lists all groups but has no add button.
-
In the side menu, select Applications.
-
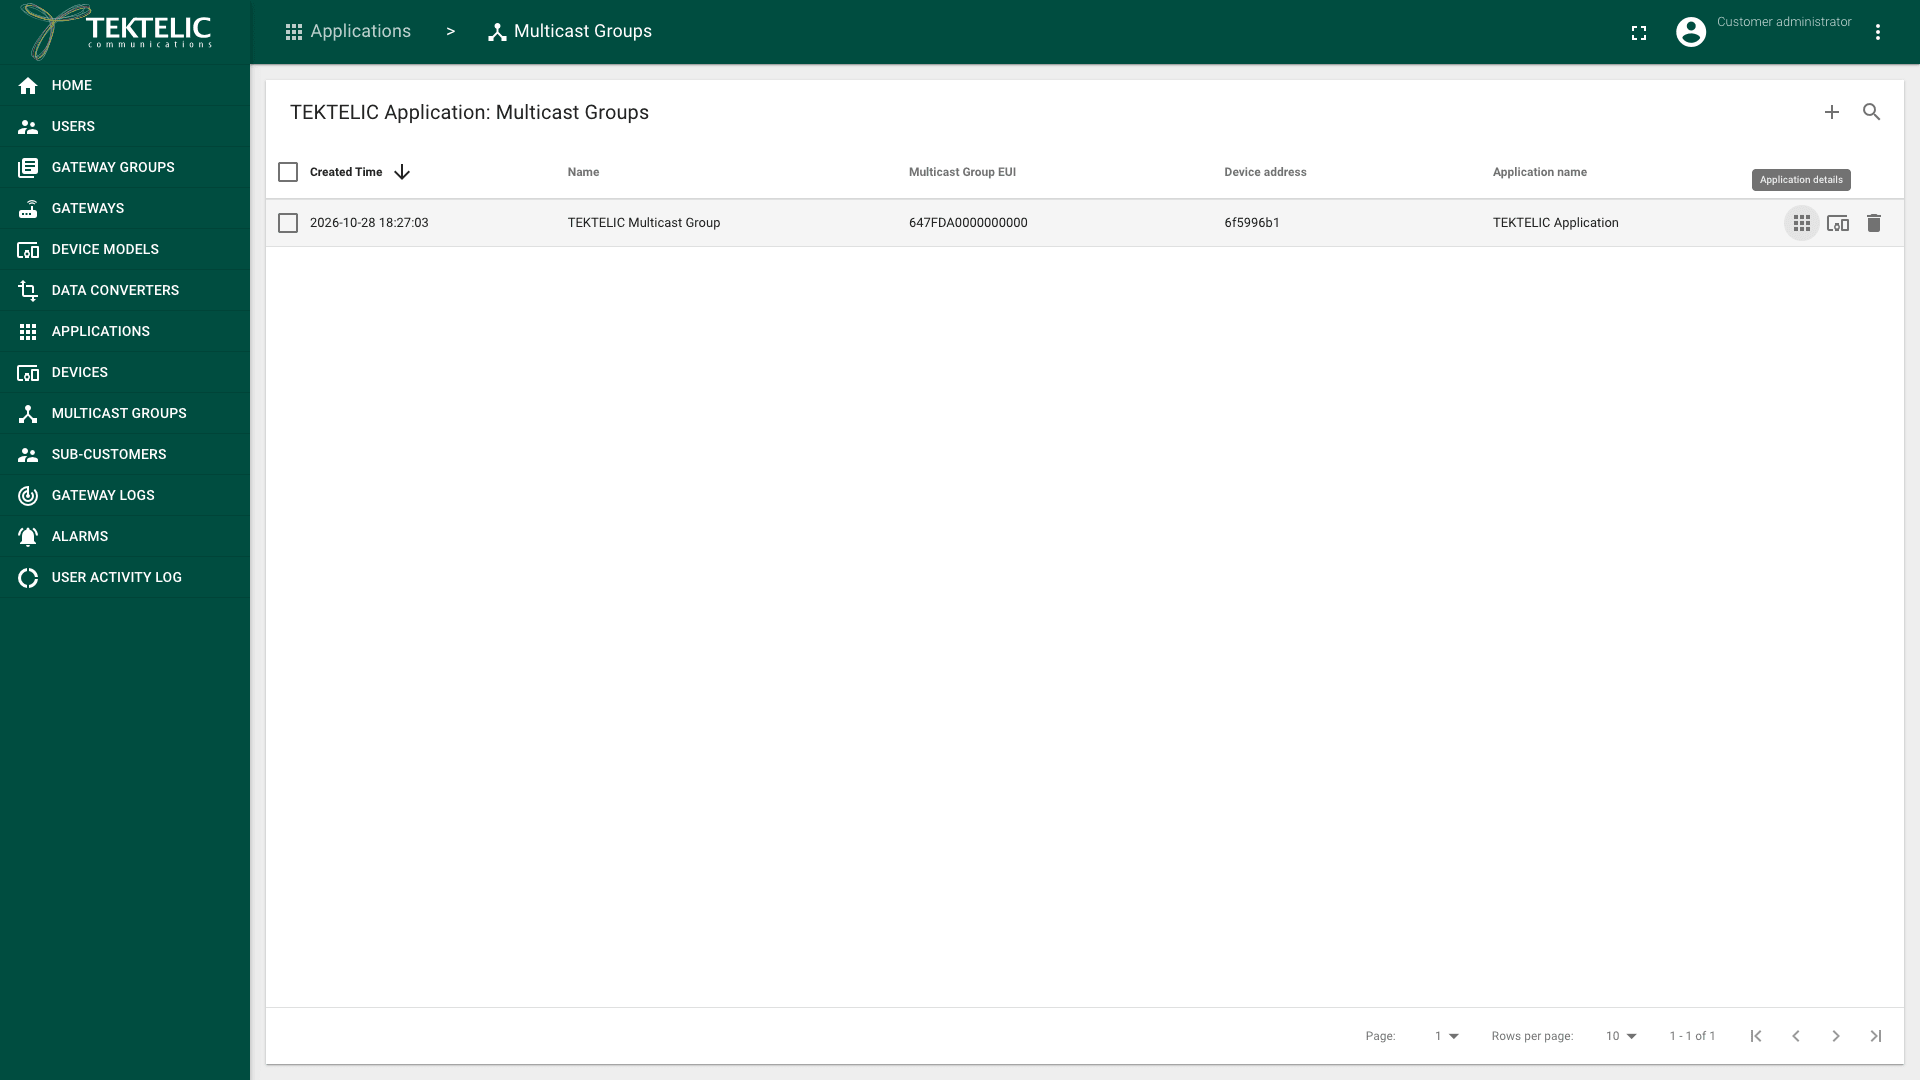
In the application's row, select Manage Multicast Groups (the hub icon). You can also select the application and then Manage Multicast Groups in its details panel. The page opens, titled with the application name and Multicast Groups.
-
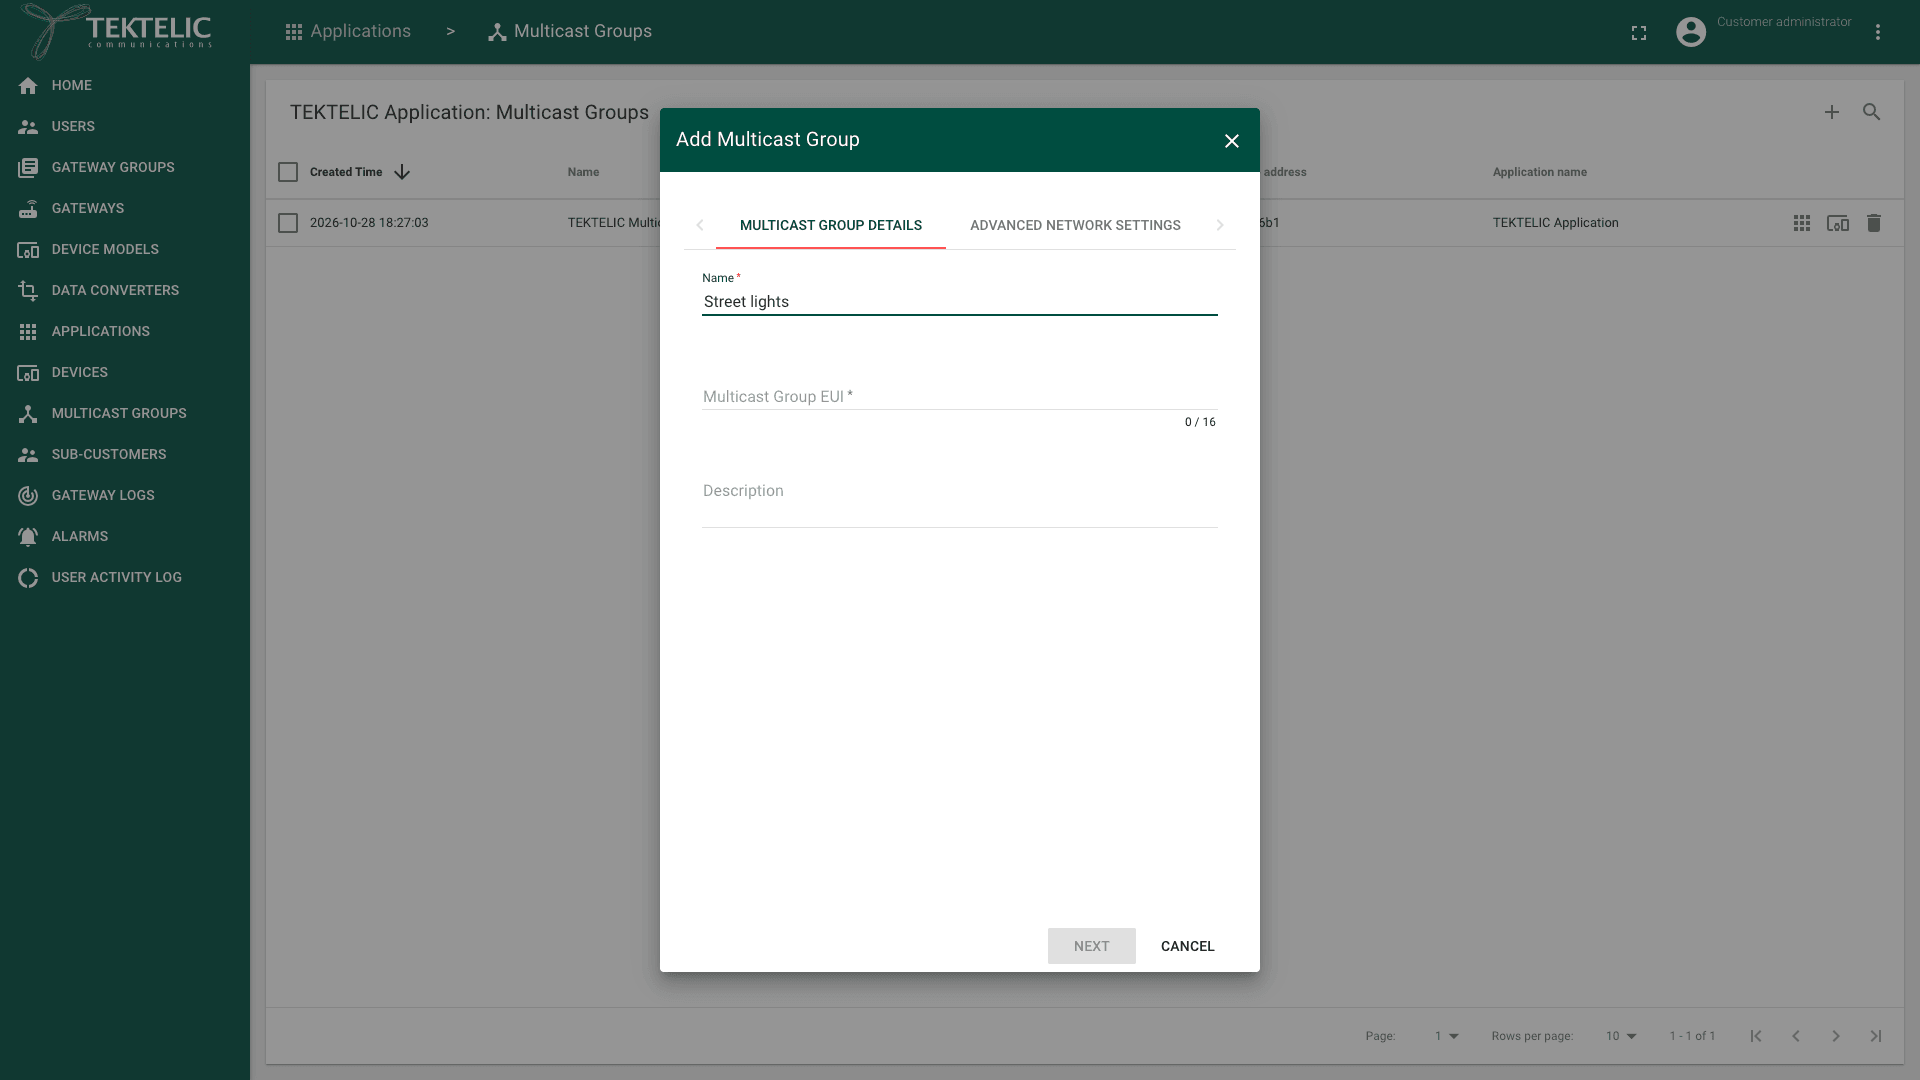
Select Add Multicast Group (the + icon). The Add Multicast Group dialog opens with the tabs Multicast Group details, Advanced network settings, Api limits and Activation.
-
Enter a Name. The name is required.
-
Enter the Multicast Group EUI: 16 hexadecimal characters. It identifies the group. confirm whether the Multicast Group EUI must be unique, and how to choose it.
-
Optional: enter a Description.
-
Select Next. The Advanced network settings tab opens.
-
Enter the RXC data-rate: the data rate of the group's downlinks. The default -1 means "not set". Valid values depend on the frequency plan.
-
Enter the RXC frequency (MHz): the frequency of the group's downlinks. The default is 0. Valid values depend on the frequency plan. Use the same values that you set on the devices.
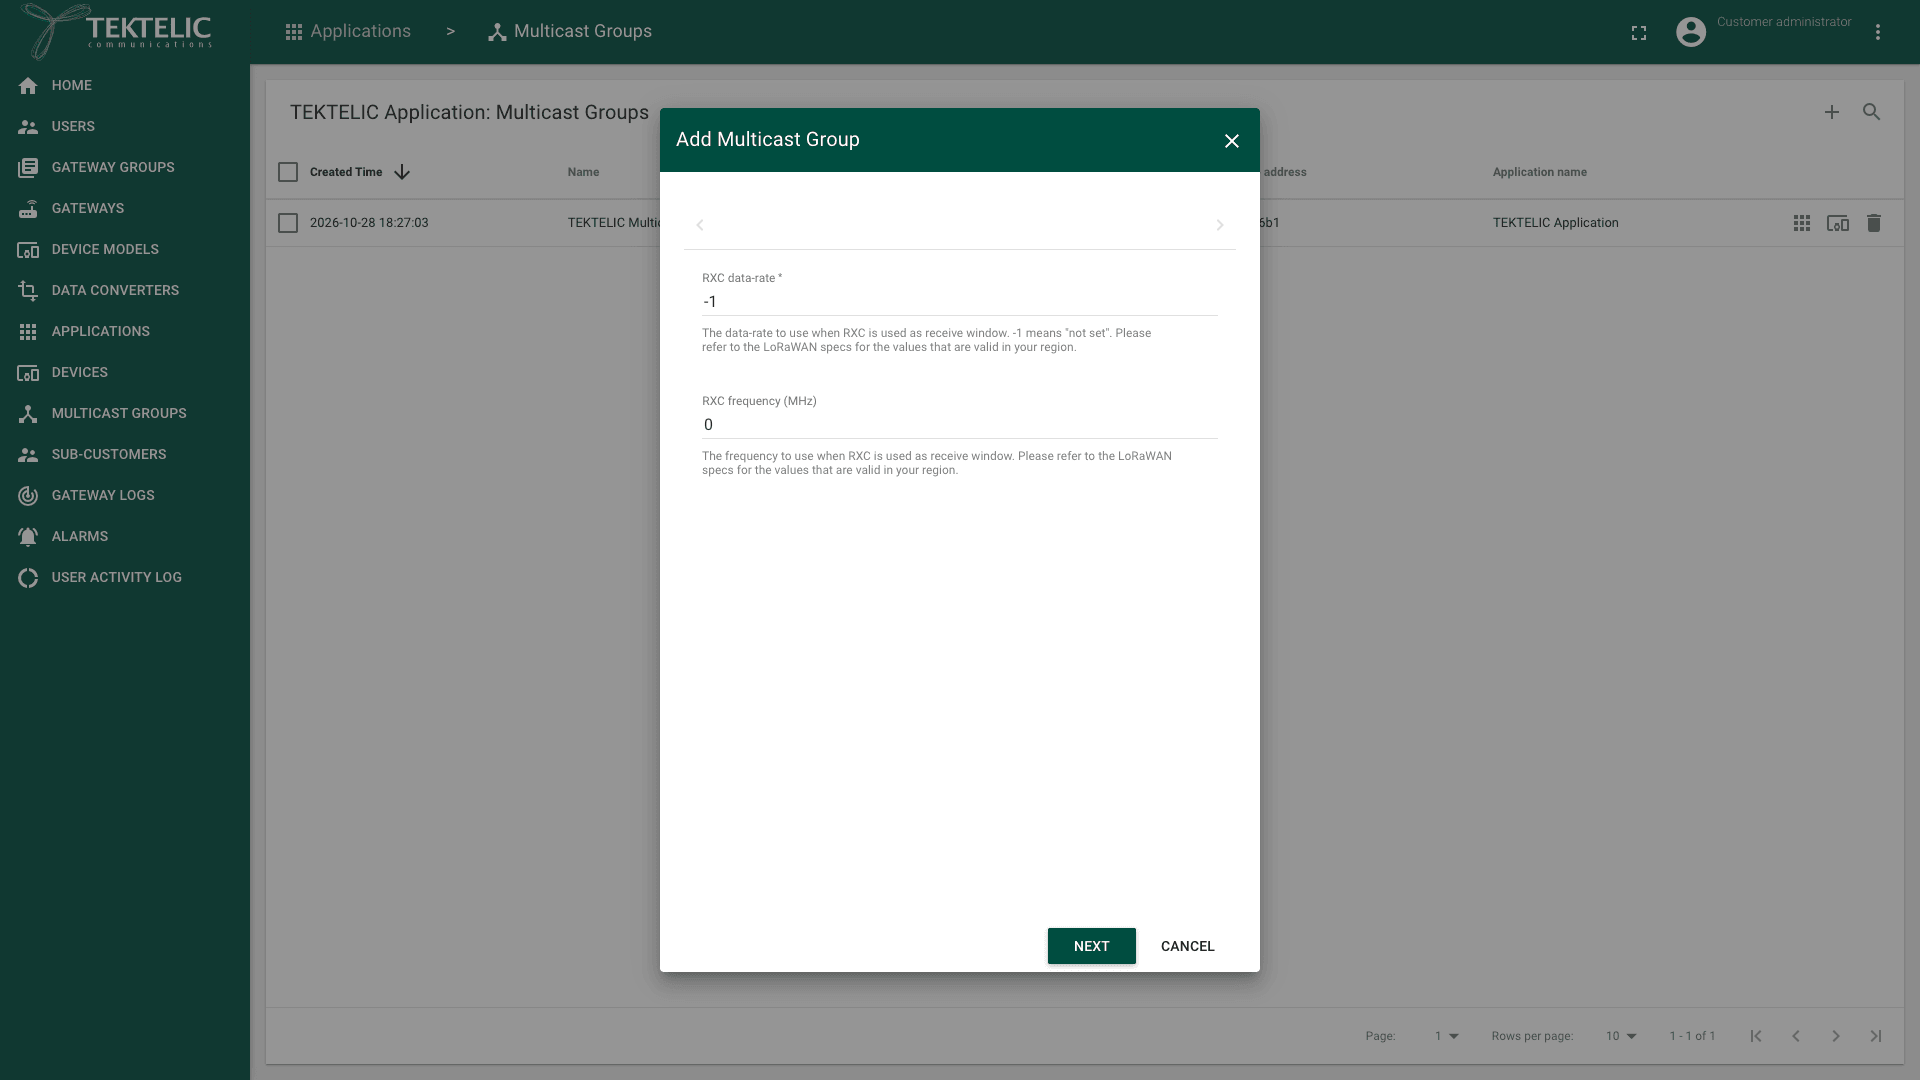
You are responsible for compliance with local radio regulations, including duty cycle and dwell time. confirm what KONA Core uses when RXC data-rate is -1 and RXC frequency is 0, for example the RX2 defaults of the frequency plan. For the other network settings, see Network Settings.
-
Select Next. Keep the Api limits tab as it is: Enabled is cleared by default. The fields are the same as for an application, see Manage Applications.
-
Select Next. The Activation tab opens.
-
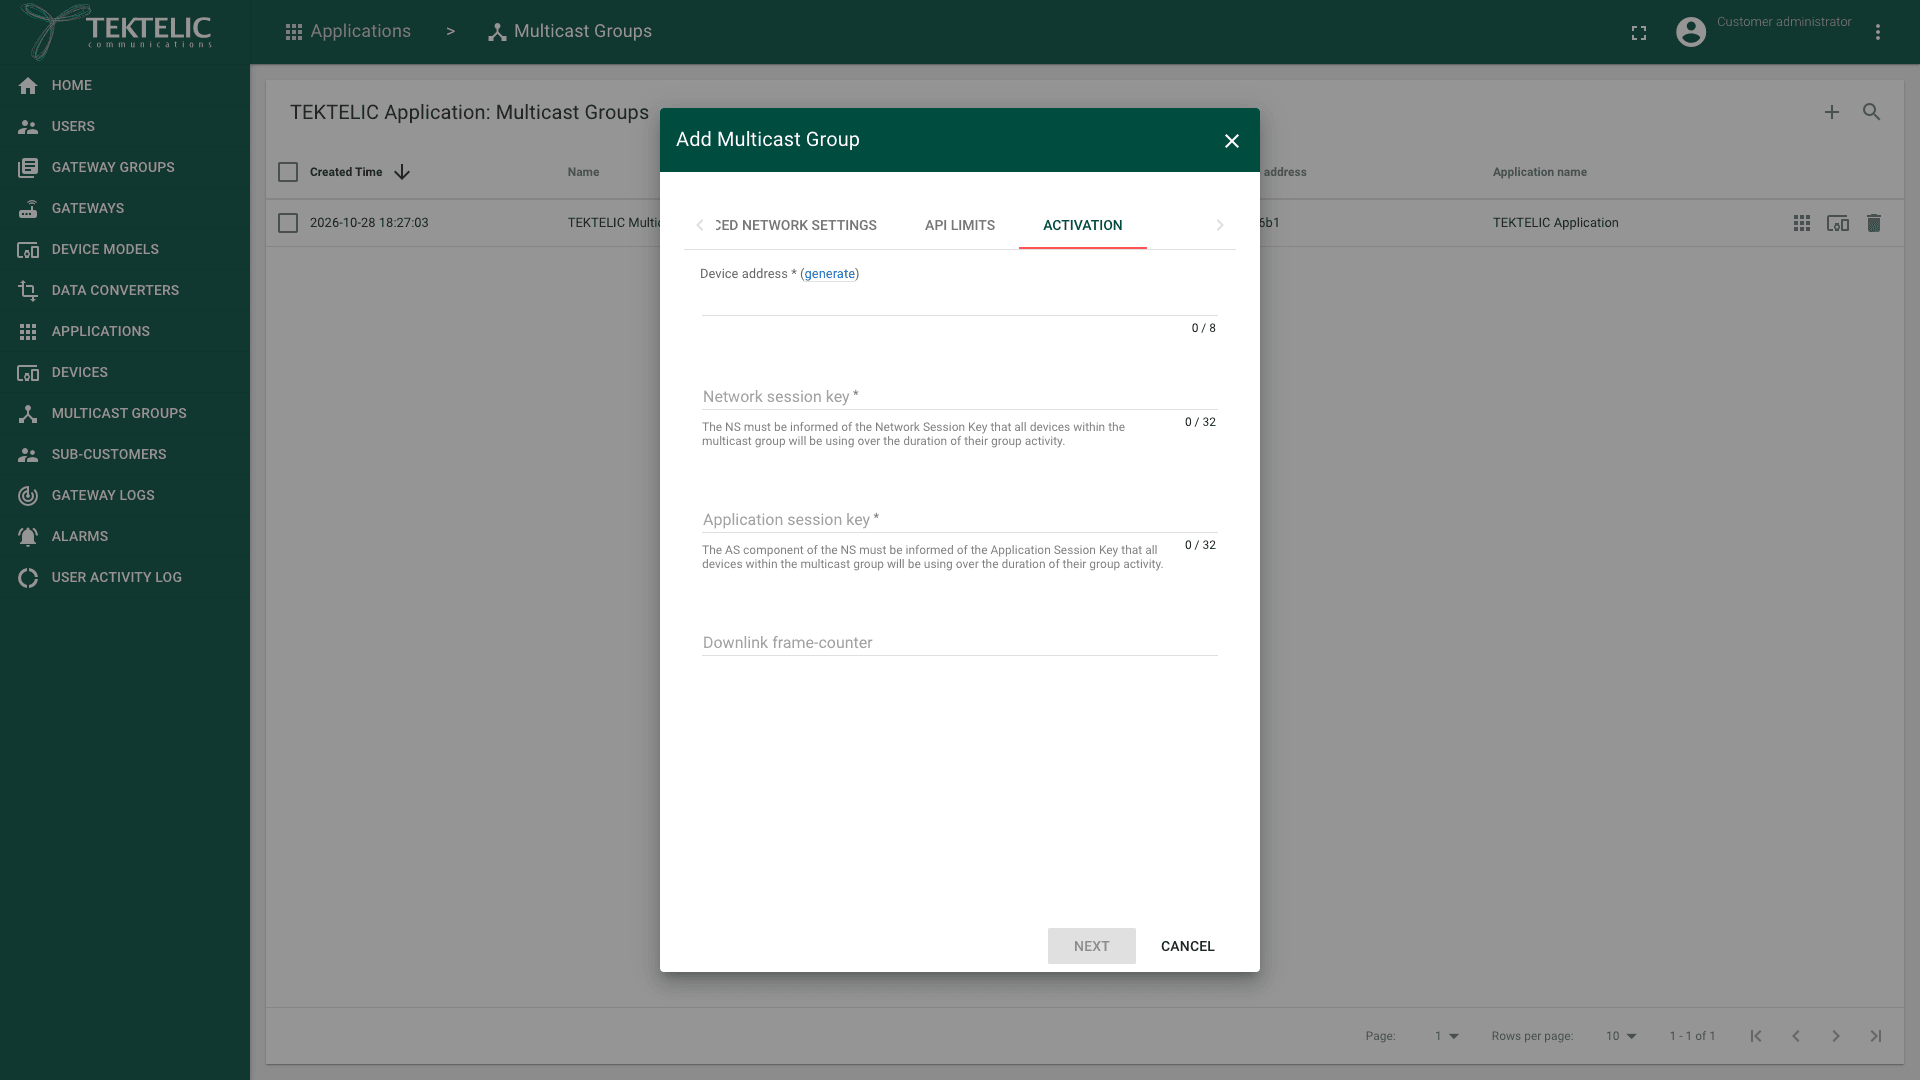
Enter the Device address: 8 hexadecimal characters. To let KONA Core create one, select generate next to the label.
-
Enter the Network session key (NwkSKey): 32 hexadecimal characters.
-
Enter the Application session key (AppSKey): 32 hexadecimal characters.
-
Optional: enter the Downlink frame-counter, the group's first downlink frame counter. Leave it empty for a new group. confirm the value KONA Core uses when Downlink frame-counter is empty.
-
Select Add. The dialog shows Add instead of Next once every required field on all tabs is valid. The group appears in the list with its Multicast Group EUI, Device address and Application name.
The session keys are secrets. Store them like an AppKey, and never send them in plain email or chat.
Step 2. Add devices to the group
-
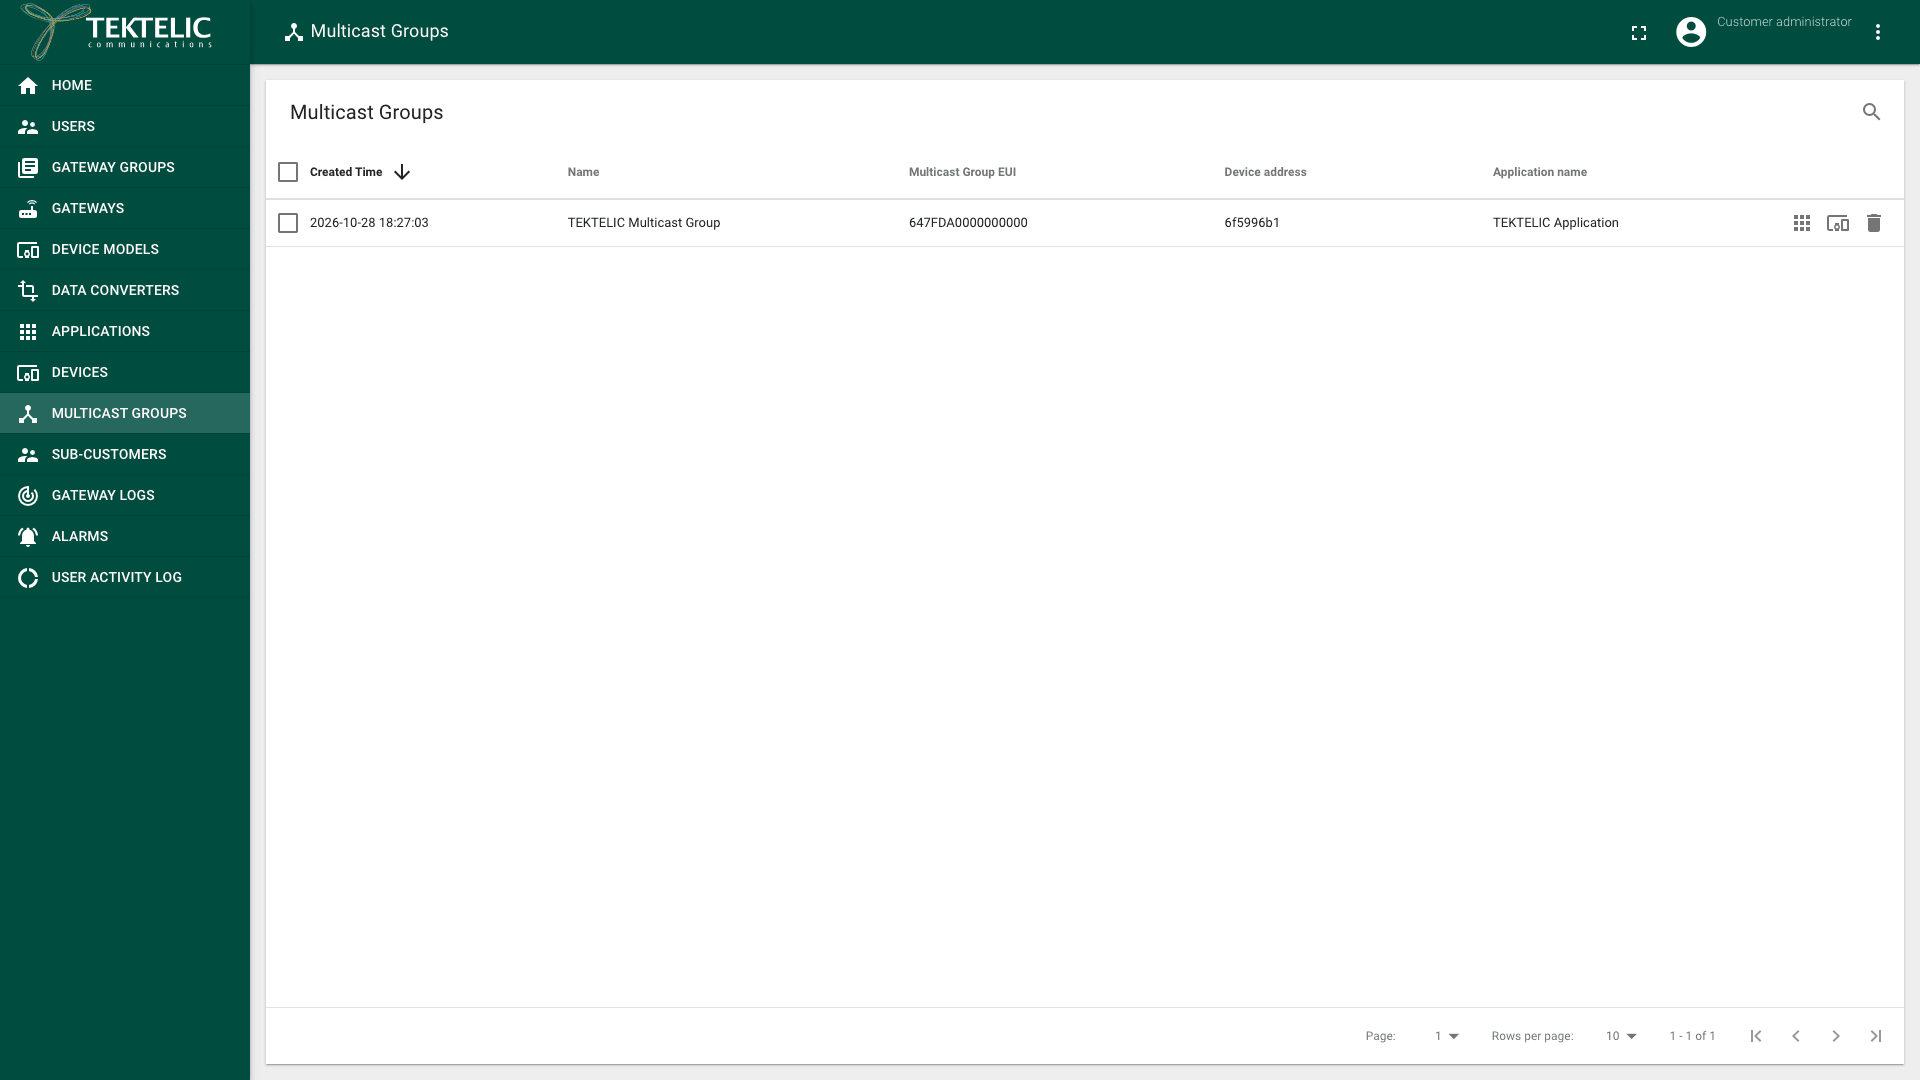
In the side menu, select Multicast Groups.
-
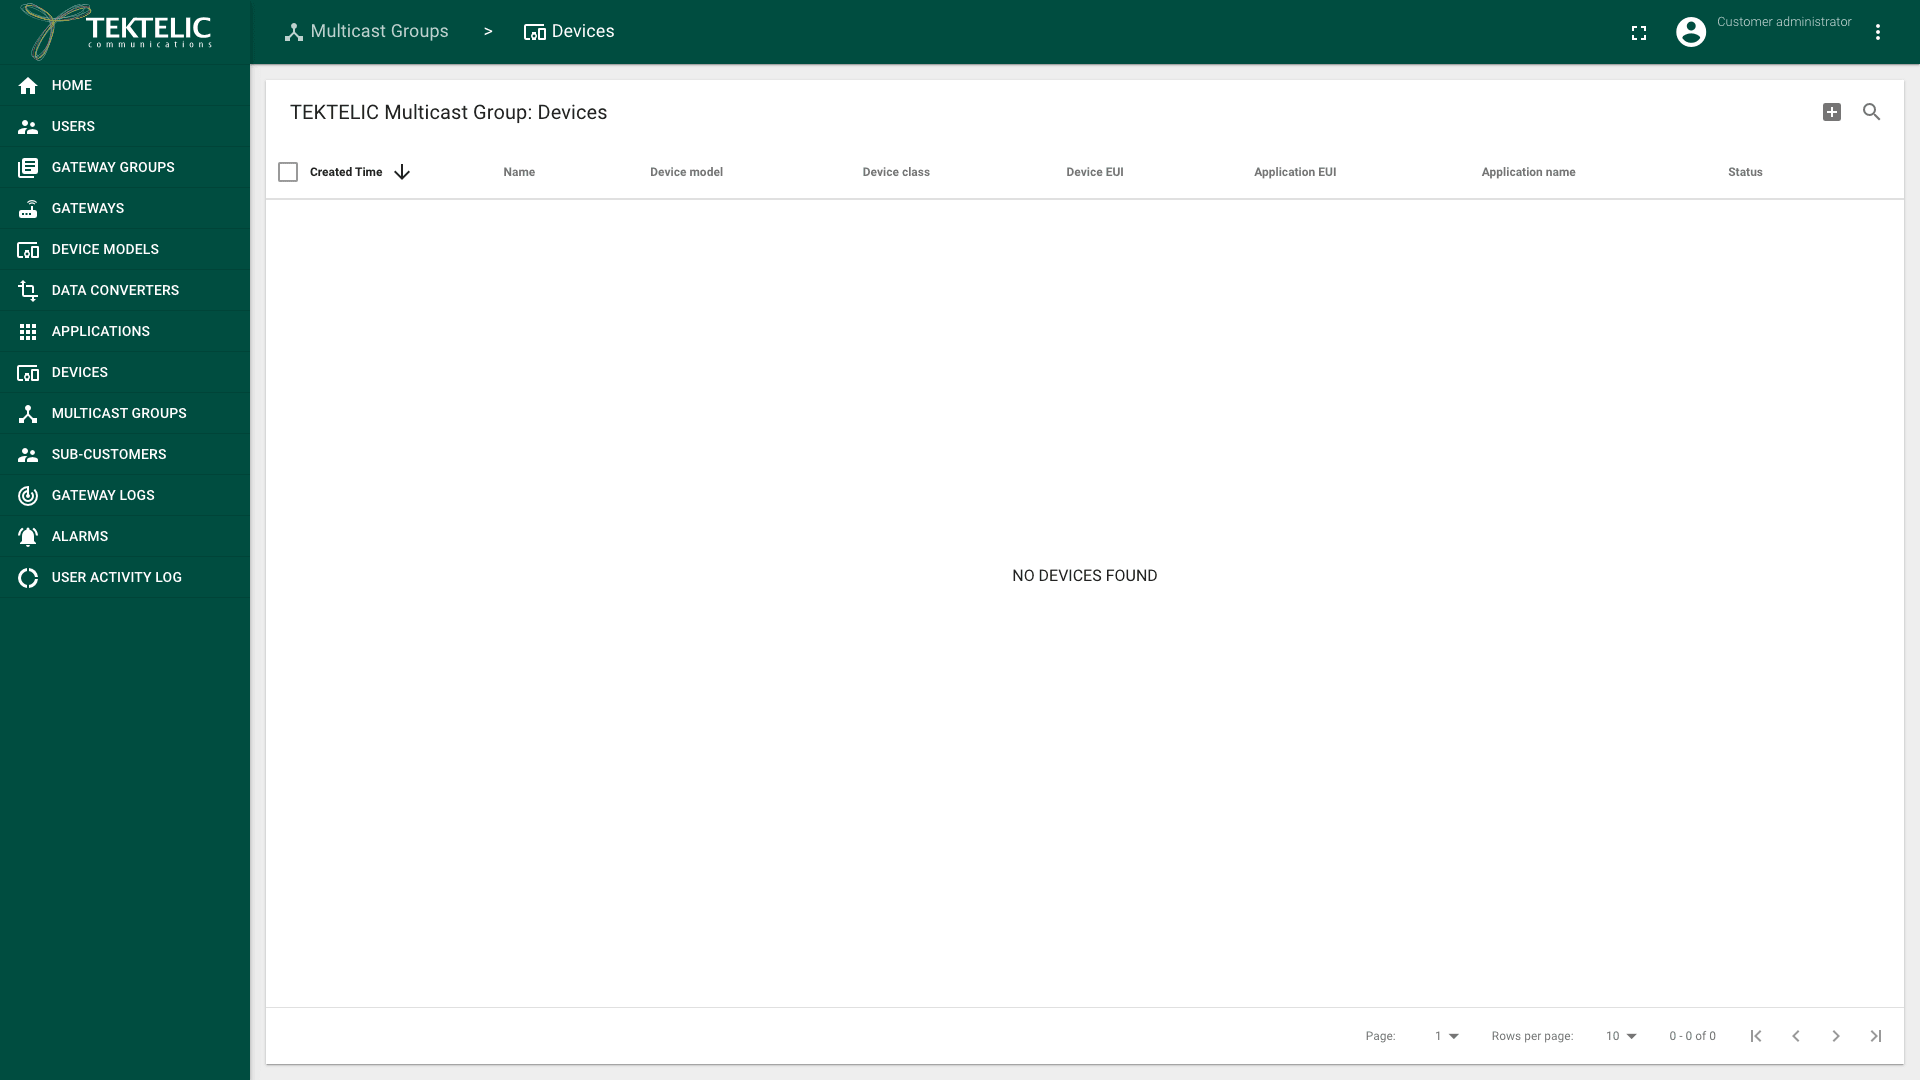
In the group's row, select Manage devices. You can also select the group and then Manage devices in its details panel. The page opens, titled with the group name and Devices.
-
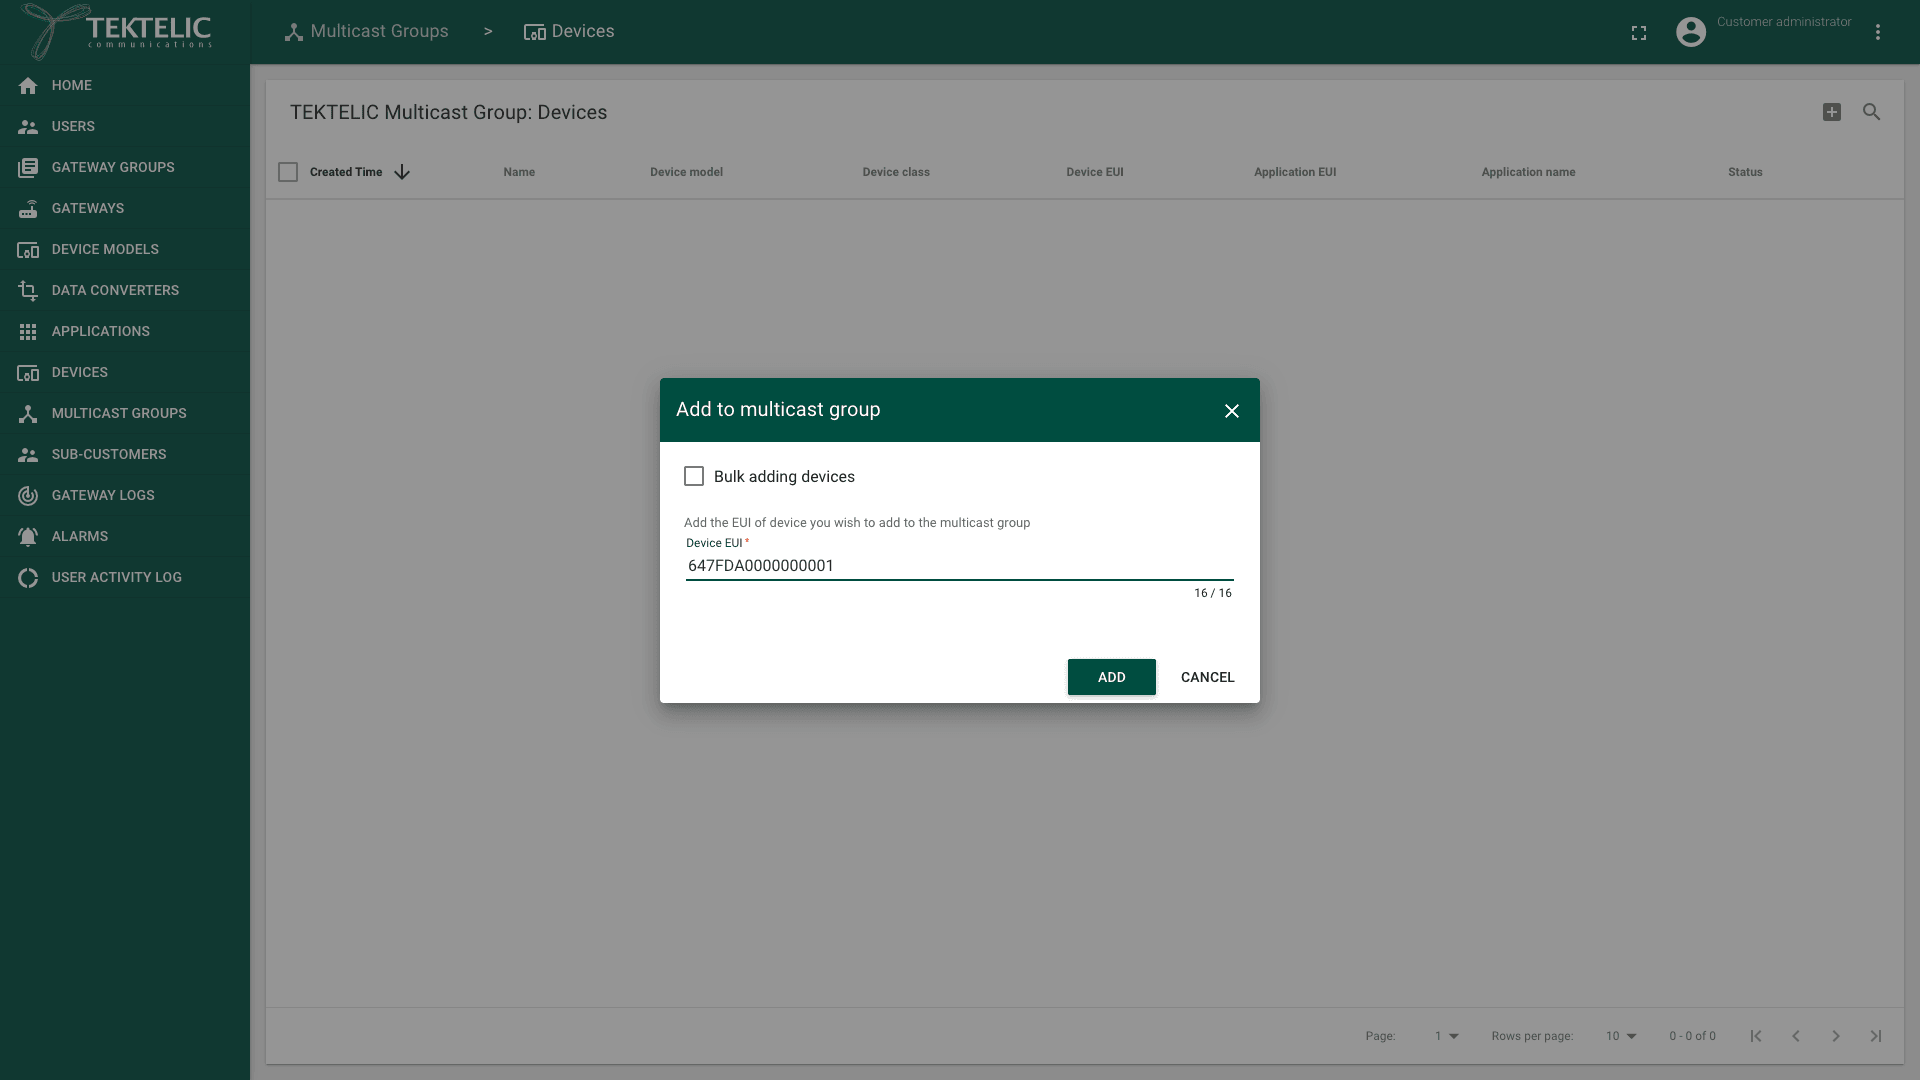
Select Add to multicast group (the box icon with a +). The Add to multicast group dialog opens.
-
Enter the Device EUI of the device: 16 hexadecimal characters.
-
Select Add. The device appears in the group's device list.
-
Repeat steps 3 to 5 for each device.
To add many devices at once, upload a CSV file:
-
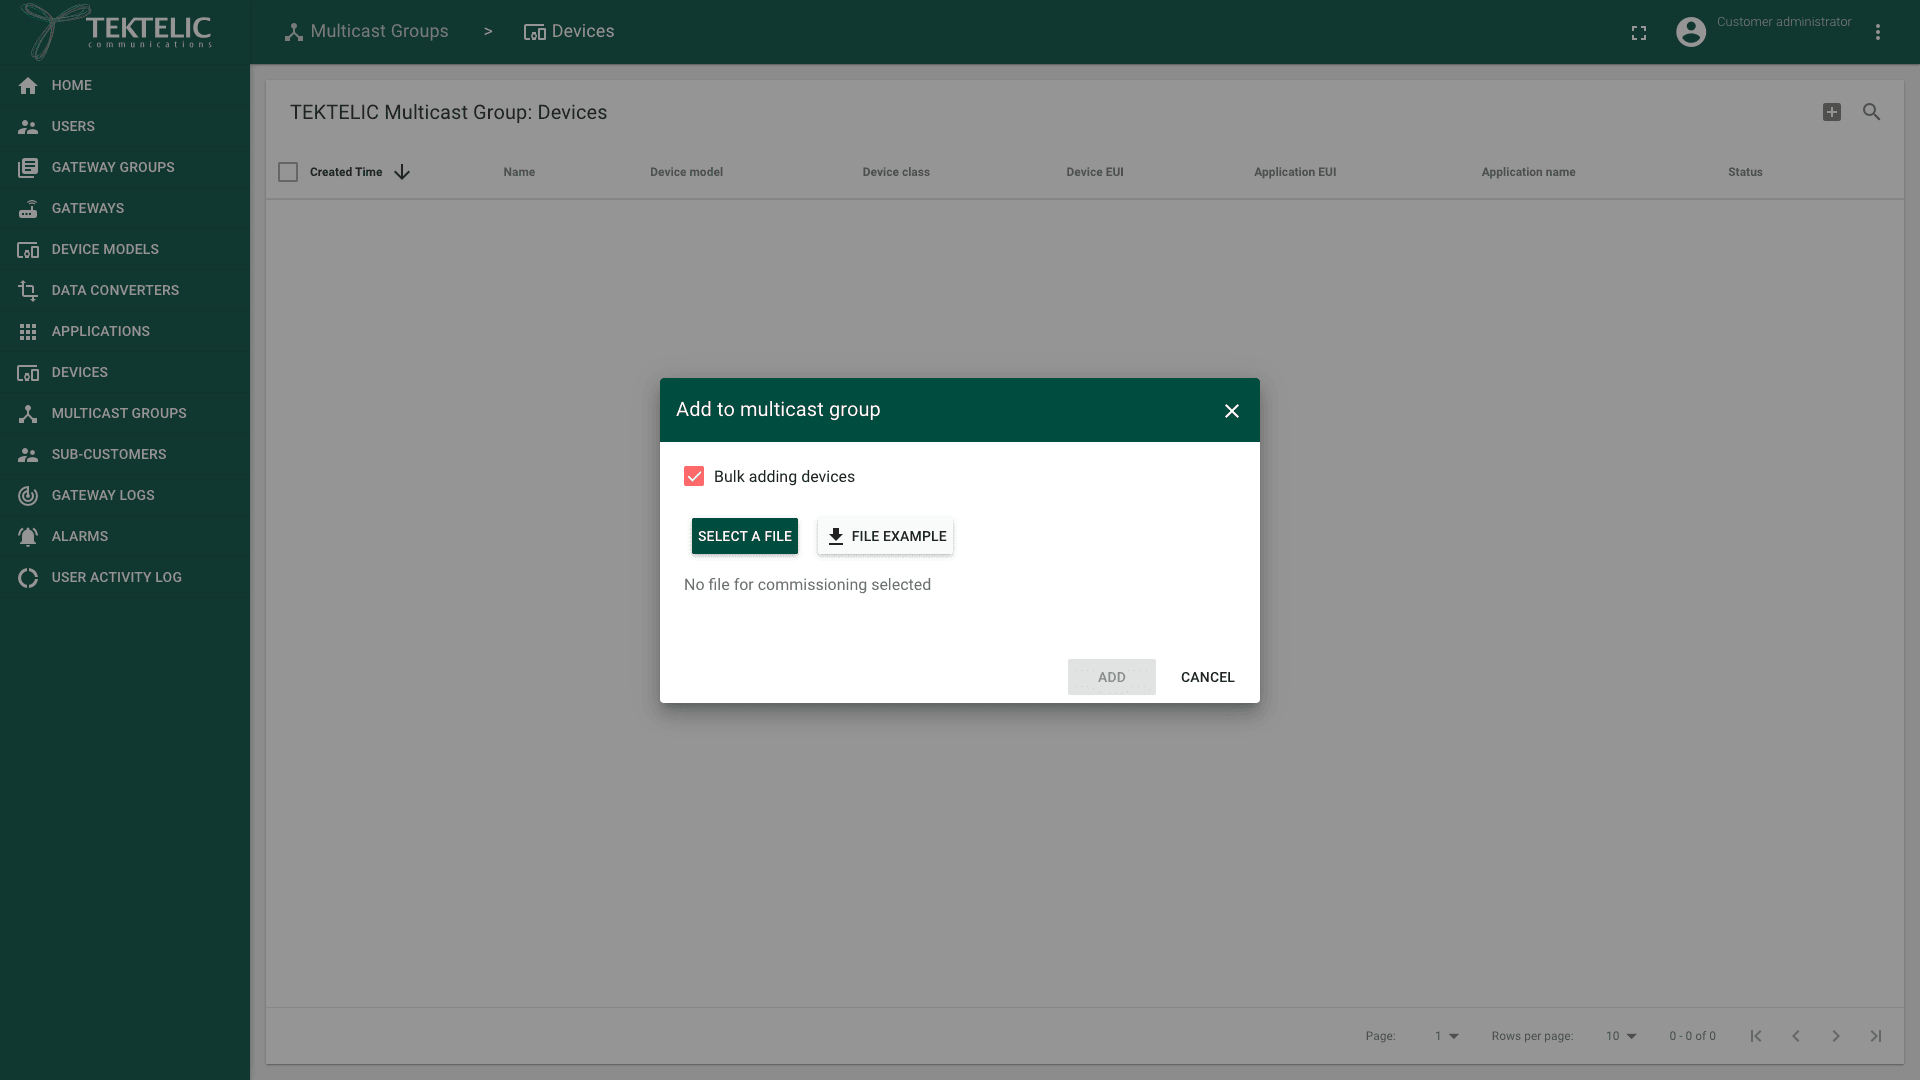
In the Add to multicast group dialog, select Bulk adding devices.
-
Select File example to download a sample file. The file has one column,
DEVEUI, and one DevEUI per row. -
Create your file in the same format.
-
Select Select a file, and choose your CSV file.
-
Select Add. The devices appear in the group's device list.
You can also add one device from the Devices page. In the device's row, select Add to multicast group. In Select target multicast group to add device, select the group, then select OK.
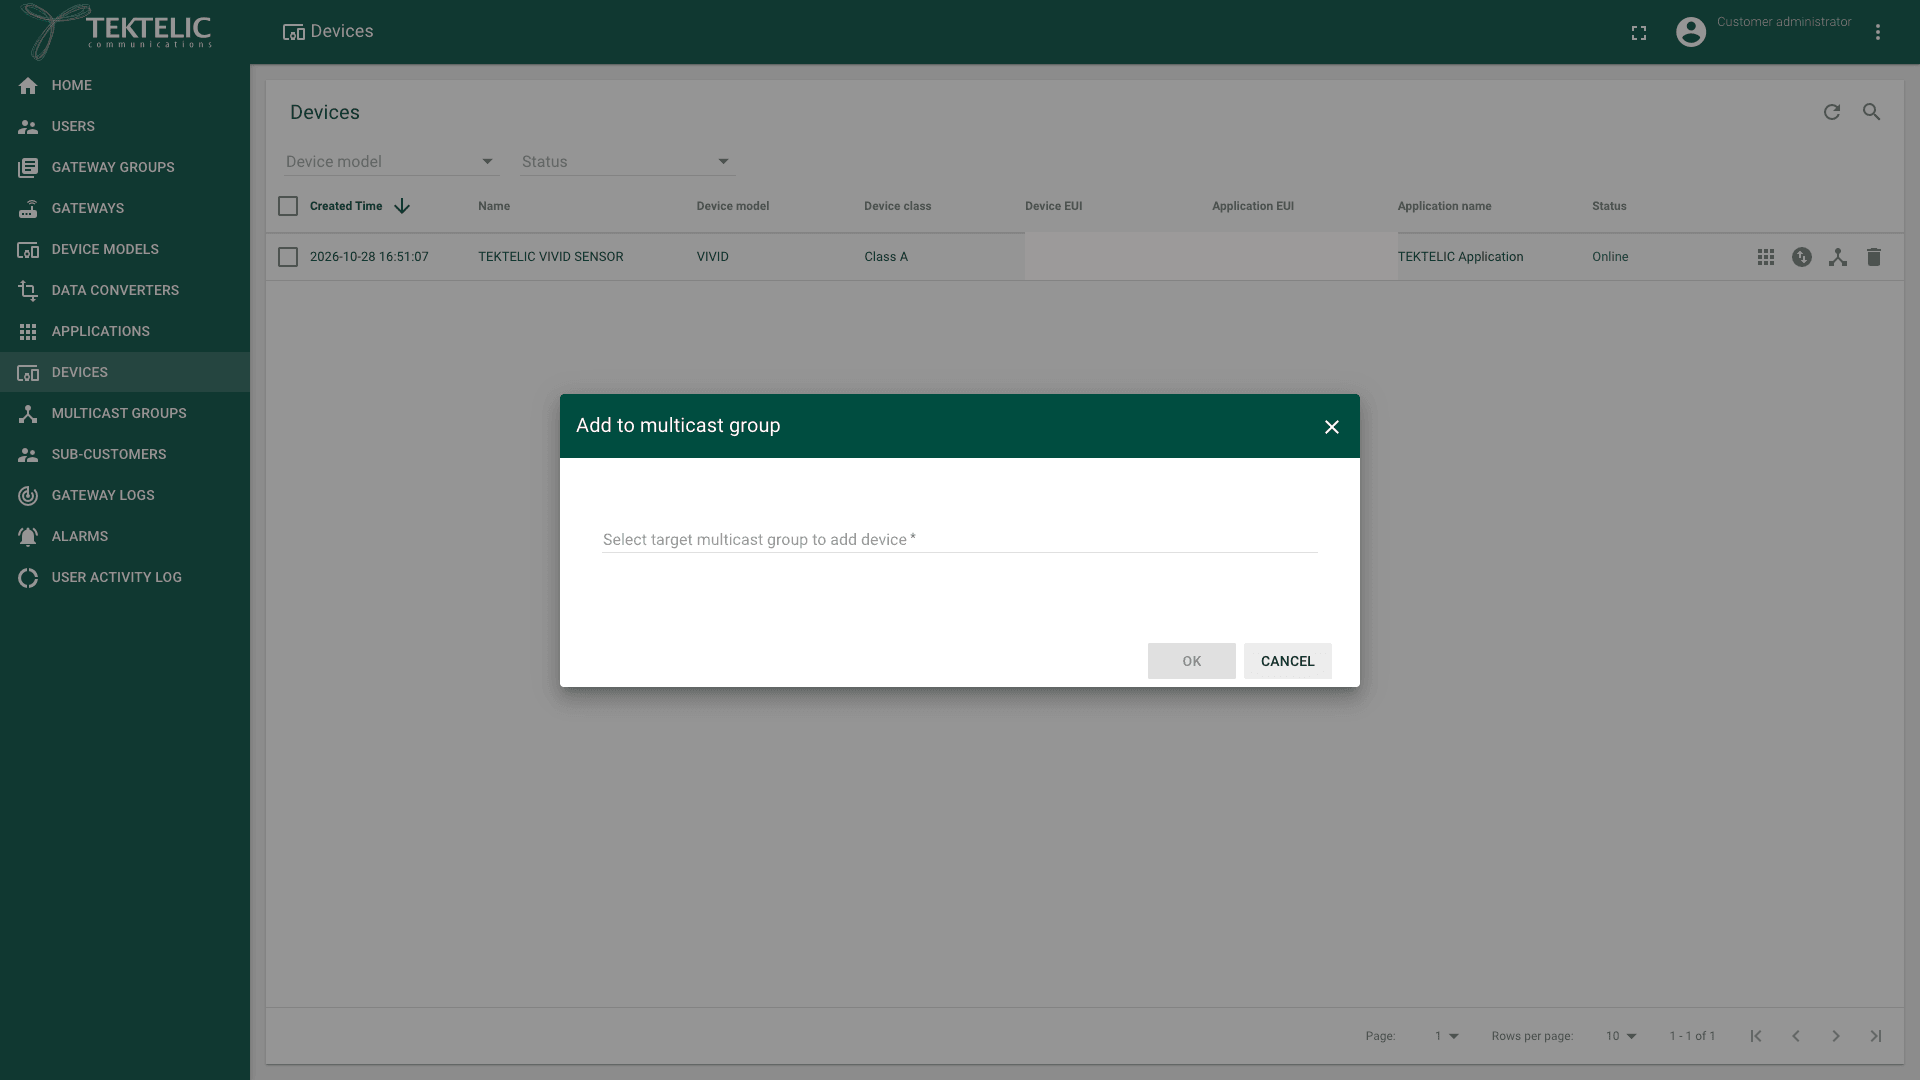
confirm whether a device can be in a group of another application, and whether a device can be in several groups.
To remove a device, open the group's device list and select Remove device from multicast group in the device's row. A dialog asks:
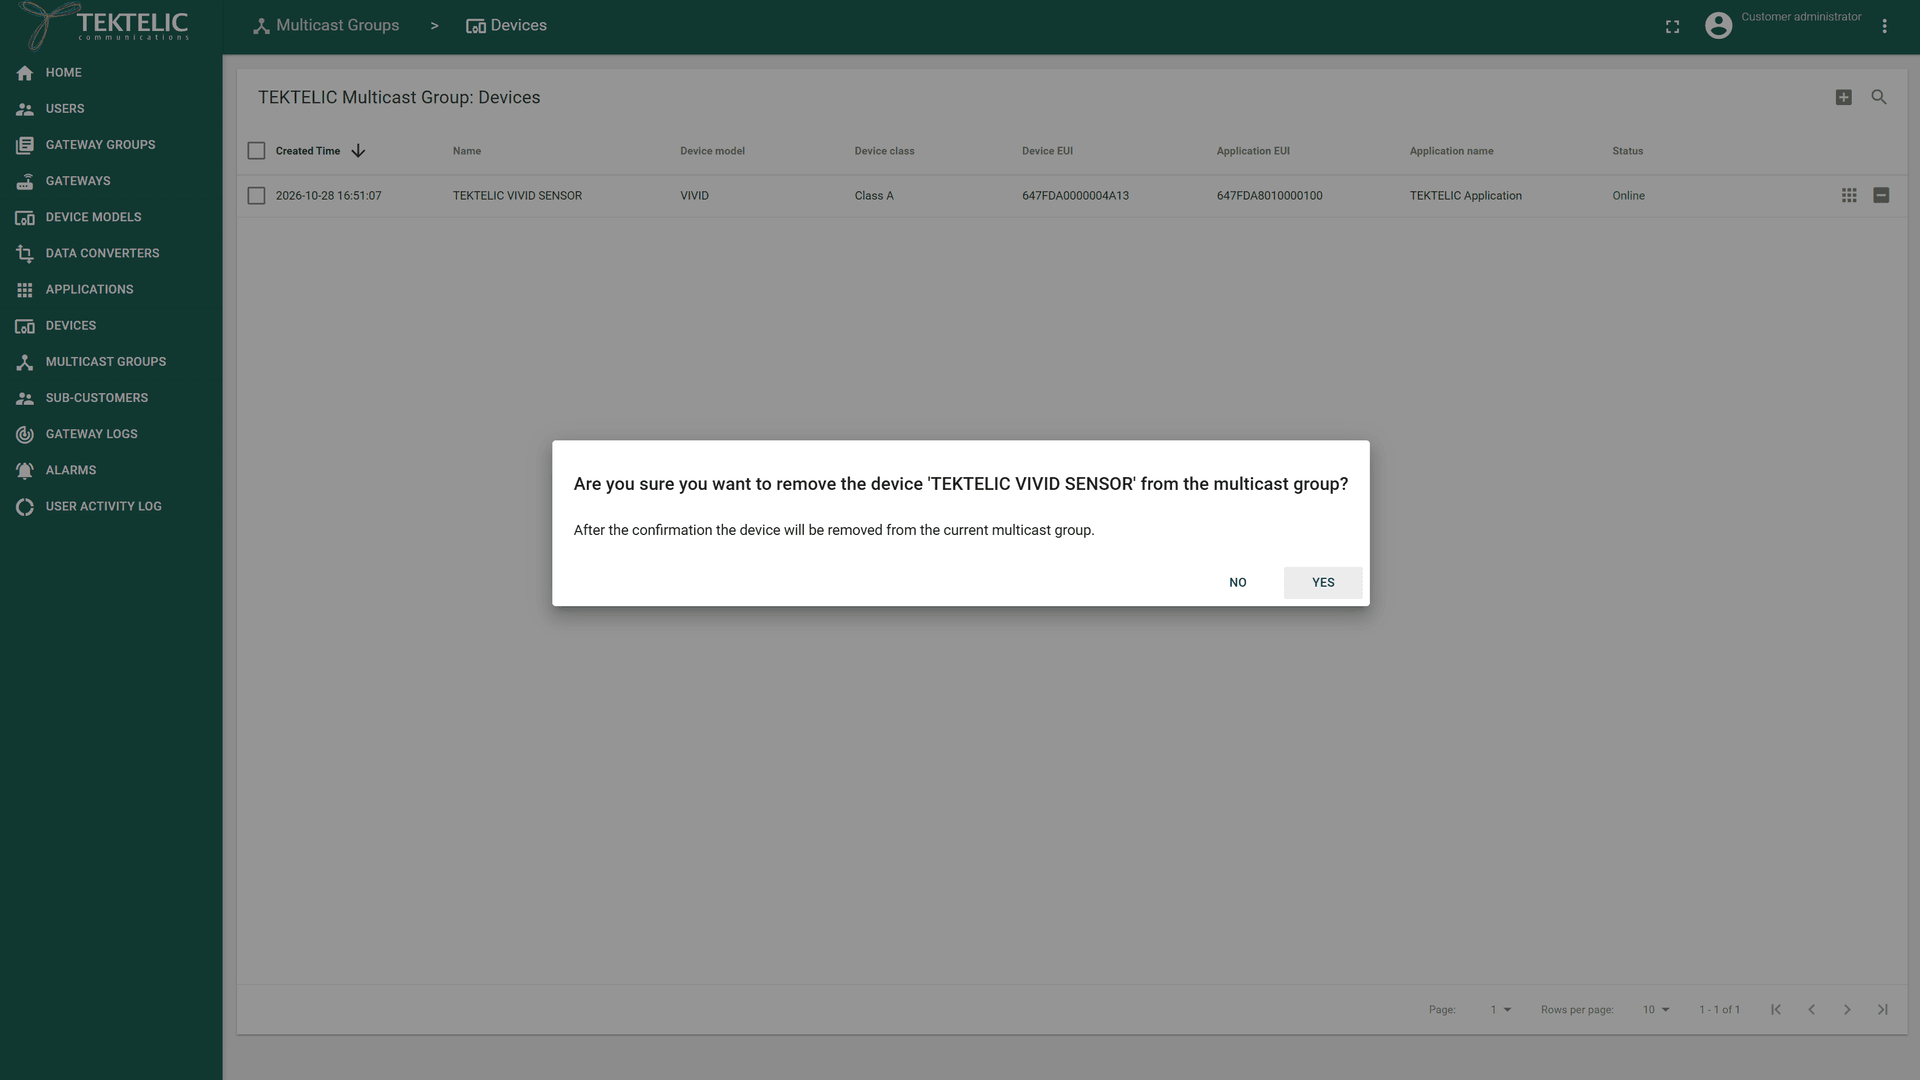
Select Yes to confirm. The device stays in its application.
Step 3. Send a multicast downlink
-
In the side menu, select Multicast Groups.
-
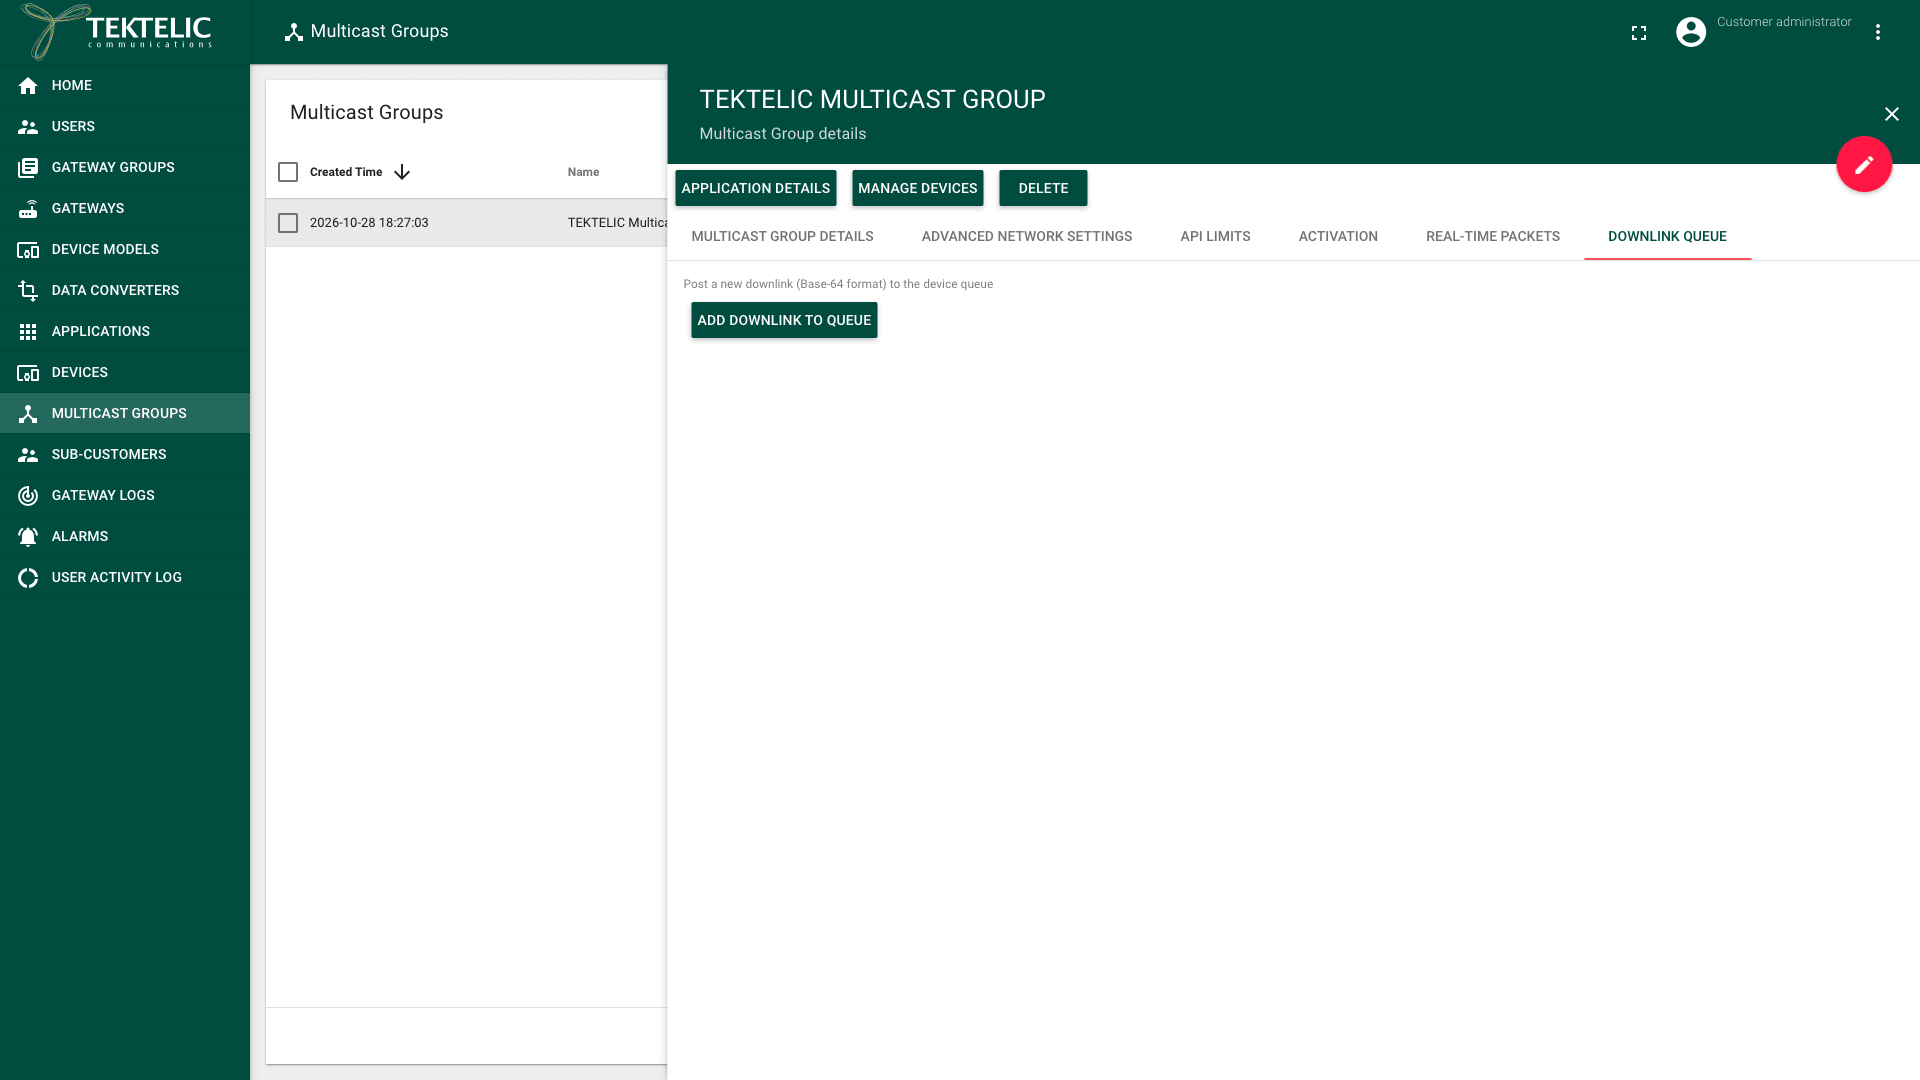
Select the group in the list. The Multicast Group details panel opens.
-
Select the Downlink queue tab.
-
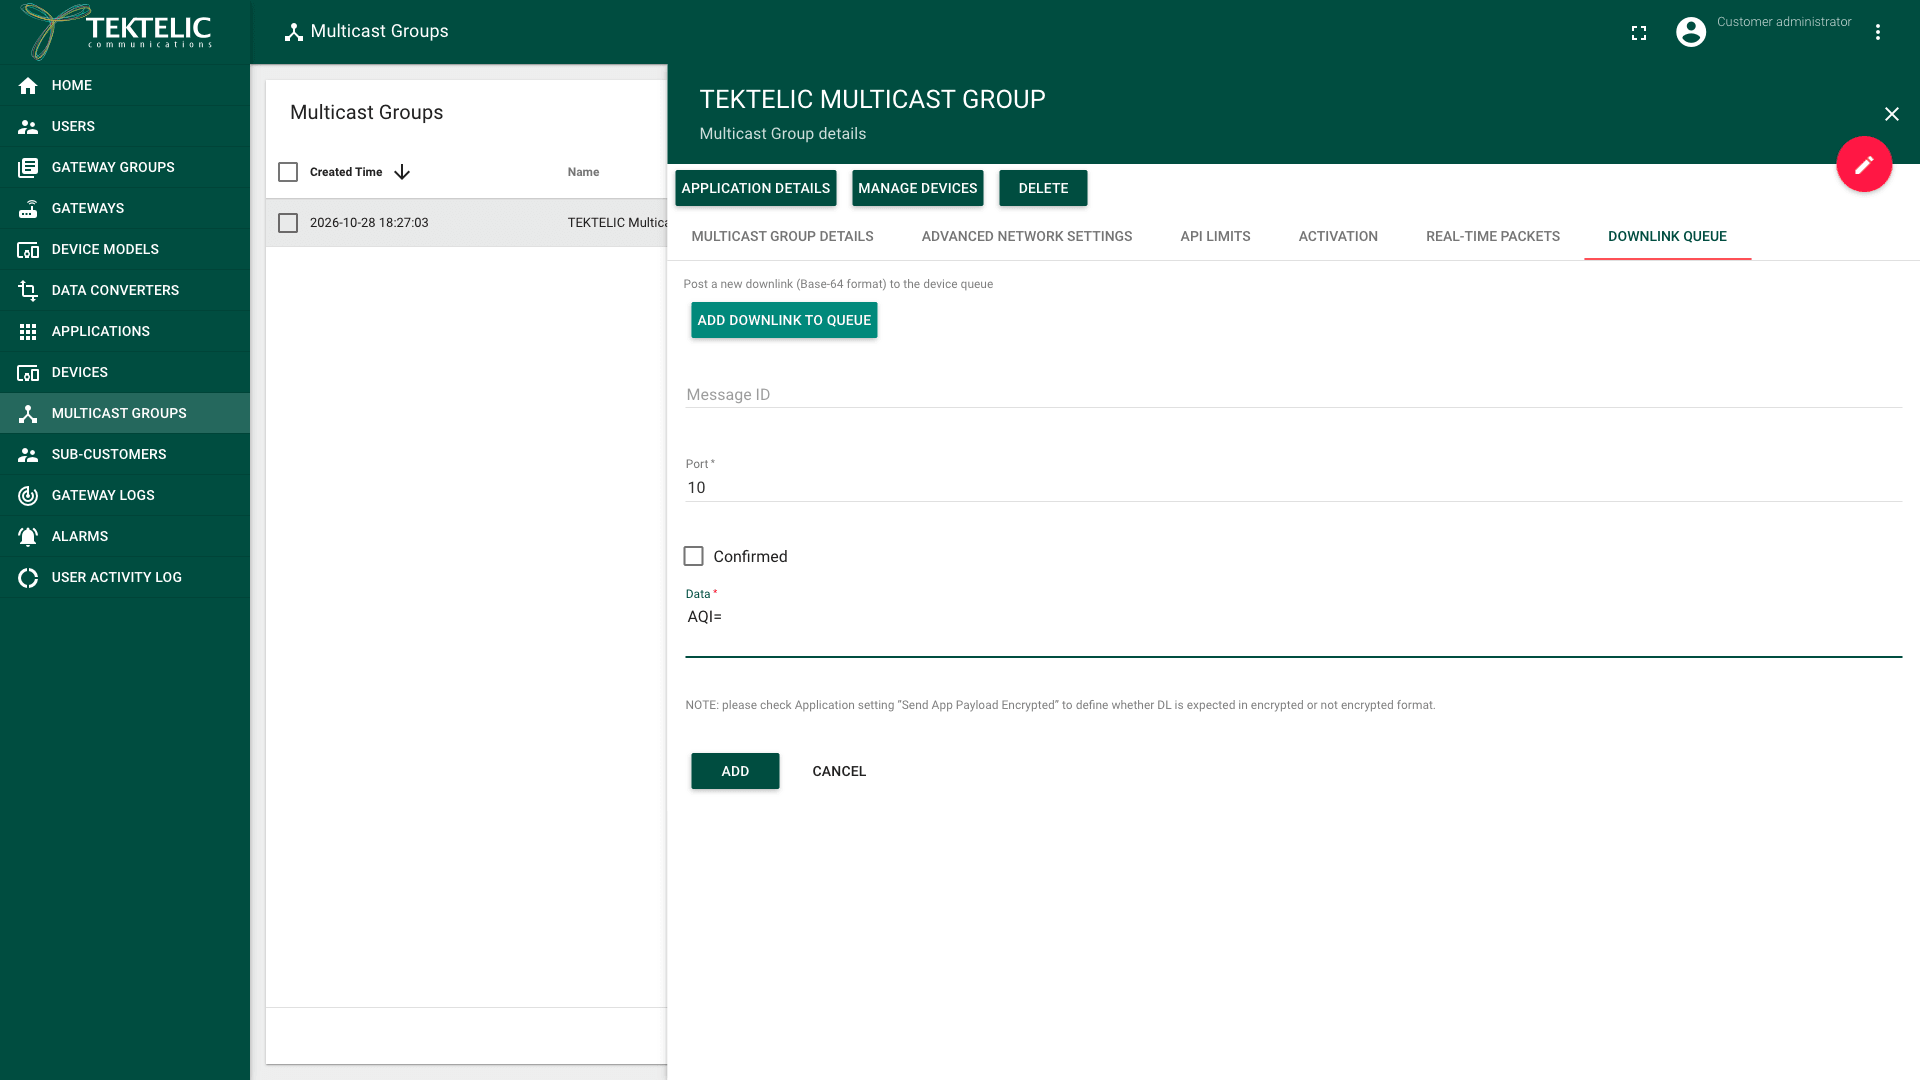
Select Add downlink to queue. The downlink form opens.
-
Optional: enter a Message ID.
-
Enter the Port: the FPort the devices expect for this command. Follow the Swagger downlink
portrange of -128 to 127. Negative values aren't LoRaWAN application ports. For port selection, see Send Downlinks. -
Leave Confirmed cleared. LoRaWAN multicast uses unconfirmed downlinks. A compliant device discards a confirmed multicast frame. confirm whether KONA Core rejects Confirmed when a multicast downlink is added.
-
Enter the Data: the payload in Base64. The form notes that the application setting Send app payload encrypted decides whether KONA Core expects the payload encrypted or not encrypted. With the setting cleared, enter the plain payload.
-
Select Add. KONA Core adds the downlink to the group's queue. confirm when KONA Core transmits a queued multicast downlink.
For Class C multicast, KONA Core selects gateways using the last uplink gateway recorded for each device in the group. It sends the downlink once through each selected gateway. A device must first send an uplink or Join Request so the server can identify a gateway for it.
For payload formats, Base64 encoding and the payload size per data rate, see Send Downlinks.
Delete a multicast group
Deleting a multicast group can't be undone. The UI warns:
-
In the side menu, select Multicast Groups.
-
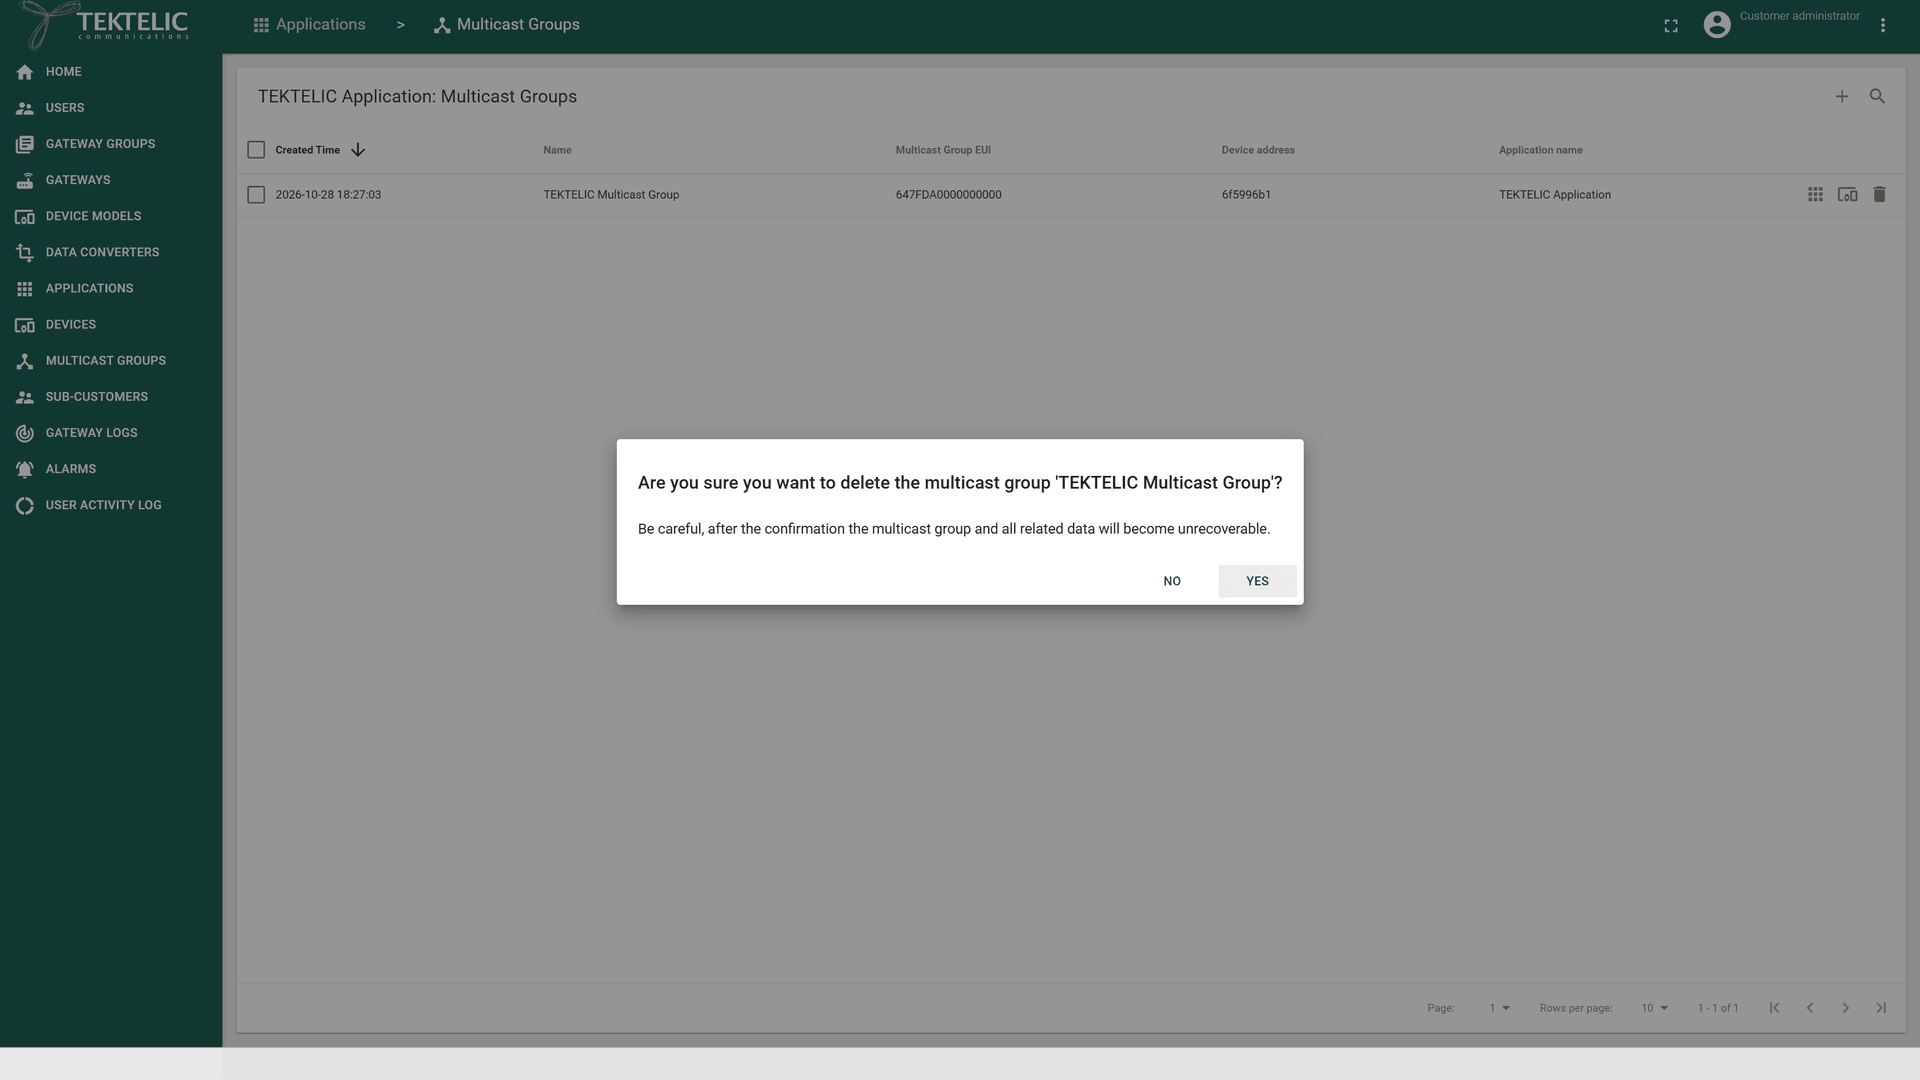
In the group's row, select Delete. A dialog asks:
-
Select Yes. The group disappears from the list. Its devices remain in their application; deleting the multicast group doesn't delete them.
Limits
| Item | Limit |
|---|---|
| Application per group | Exactly 1 |
| Multicast Group EUI | 16 hexadecimal characters |
| Device address | 8 hexadecimal characters |
| Network session key, Application session key | 32 hexadecimal characters each |
| Downlink Port | -128 to 127 in the Swagger schema; use the device's valid LoRaWAN application port. |
| Packets per period | Set on the group's Api limits tab. Disabled by default. |
| Devices per group | confirm the maximum number of devices in a multicast group. |
The downlink payload size depends on the RXC data rate and the frequency plan. See Regions & Frequency Plans.
Check the result
- Group: the Multicast Groups page lists the group with its Multicast Group EUI, Device address and Application name.
- Devices: the group's device list shows every device you added, with its Device class and Status.
- Downlink: the devices react to the command, for example they change their configuration. On the group's Real-time packets tab, check for the downlink. confirm whether multicast downlinks appear on the group's Real-time packets tab, and with which Message Type.
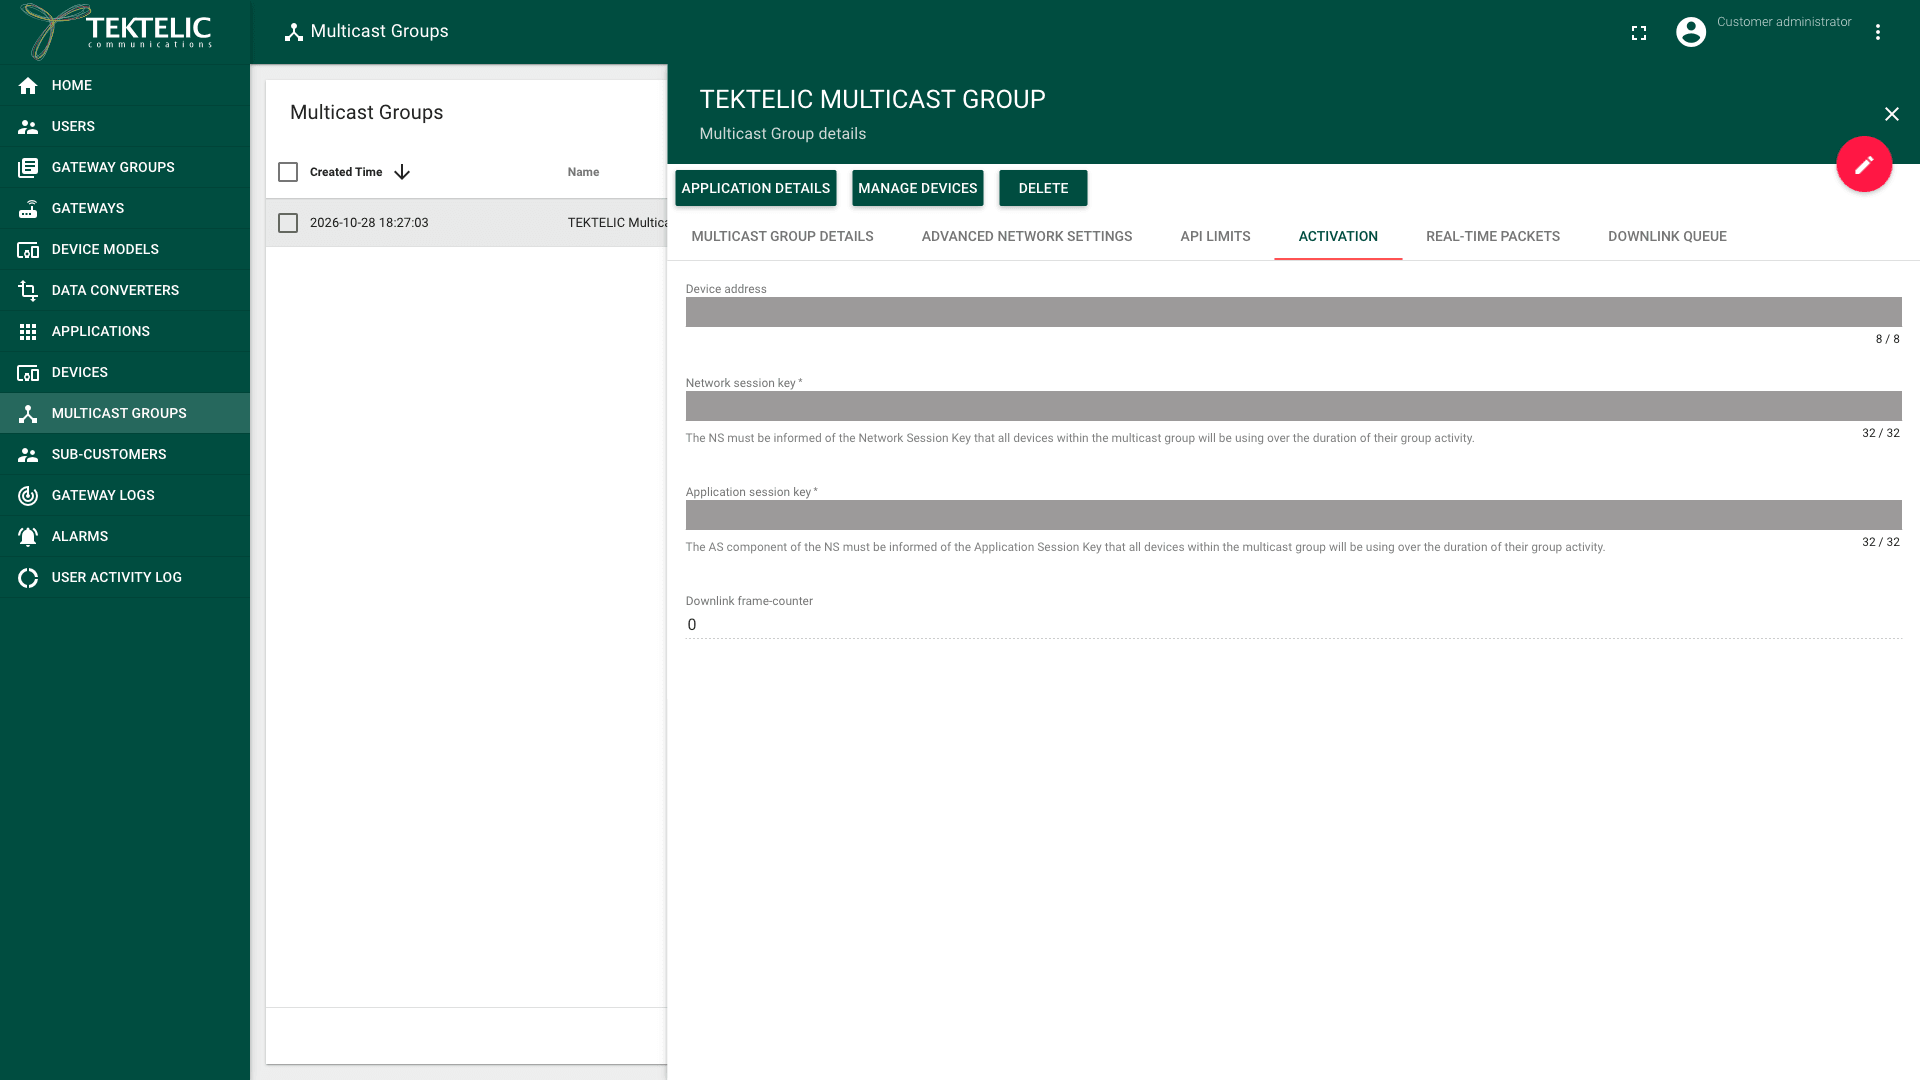
To check the group's address and keys, open the group's Activation tab and compare them with the values on a device.
To manage groups from your own system, use Save multicast group and Add devices to multicast group.
Troubleshooting
| Symptom | Likely cause | What to do |
|---|---|---|
| The dialog shows Next but no Add. | A required field on one of the tabs is empty or invalid, for example a key with fewer than 32 characters. | Go through the tabs and fix the fields that show an error, such as |
| The devices don't react to the multicast downlink. | The devices run Class A. Or their multicast Device address or session keys differ from the group's. Or the RXC data rate or frequency differs from the devices' settings. | Check the Device class column of the group's device list. Compare the Activation tab and the Advanced network settings tab with the device configuration. |
| Adding a device fails. | The Device EUI is wrong, or the device isn't in KONA Core. confirm the error message and whether the device must be in the group's application. | Copy the DevEUI from the Devices page and try again. |
Still stuck? A Sub-Customer contacts their Customer, a Customer contacts their Provider, and a Provider contacts TEKTELIC Support. Send the Multicast Group EUI, the DevEUIs of the devices, the time in UTC, the exact error message and a screenshot. Never send the session keys.