Send Downlinks
Overview
Send a downlink to a LoRaWAN® device from TEKTELIC KONA Core Network Server, for example a configuration command for a TEKTELIC sensor. You add the downlink to the device's downlink queue, and KONA Core sends it at the device's next receive window. At the end, you see the downlink leave the queue and appear in the device's packets.
This guide covers one downlink at a time, from the UI. For the full path of a downlink through KONA Core, see Uplink & Downlink Data Flow.
Before you start
- Role: Customer administrator or Sub-Customer administrator. User roles are read-only. Provider roles have no top-level Devices page; their access to their own Customers is described in Tenancy Model. See Users, Roles & Permissions.
- Device: added to KONA Core and joined. Its Status is Online. See Device Activity & Status.
- Payload: the bytes the device expects, encoded in Base64, and the FPort the device listens on. For a TEKTELIC device, take both from the device's user guide. add the official device documentation that lists command bytes and FPort values, for example for changing the reporting interval.
- Application setting: check Send app payload encrypted on the device's application. When it's cleared, you enter the payload unencrypted. When it's selected, KONA Core expects the payload already encrypted with the AppSKey. See Security & Keys.
Steps
Choose the port and the delivery type
- Port: use the FPort specified by the device's documentation. The KONA Core Swagger schema declares the downlink
portrange as -128 to 127. This API range doesn't make negative values valid LoRaWAN application ports. In LoRaWAN, port 0 carries MAC commands, and application data uses ports 1 to 223. See Add downlink to queue. - Confirmed or unconfirmed: we recommend a confirmed downlink for commands that must arrive, such as a configuration change. The device acknowledges it in its next uplink. Use unconfirmed downlinks for frequent or noncritical data, because each acknowledgment costs the device an uplink.
- Payload size: the maximum downlink size depends on the LoRaWAN limits for the frequency plan and data rate. KONA Core drops a downlink that can't fit in the allowed MACPayload size and raises
LARGE_DL_DROPPED. MACPayload includes the frame header, port and application payload.
Add the downlink to the queue
-
In the side menu, select Devices.
-
Select your device's name in the list. The Device details panel opens.
-
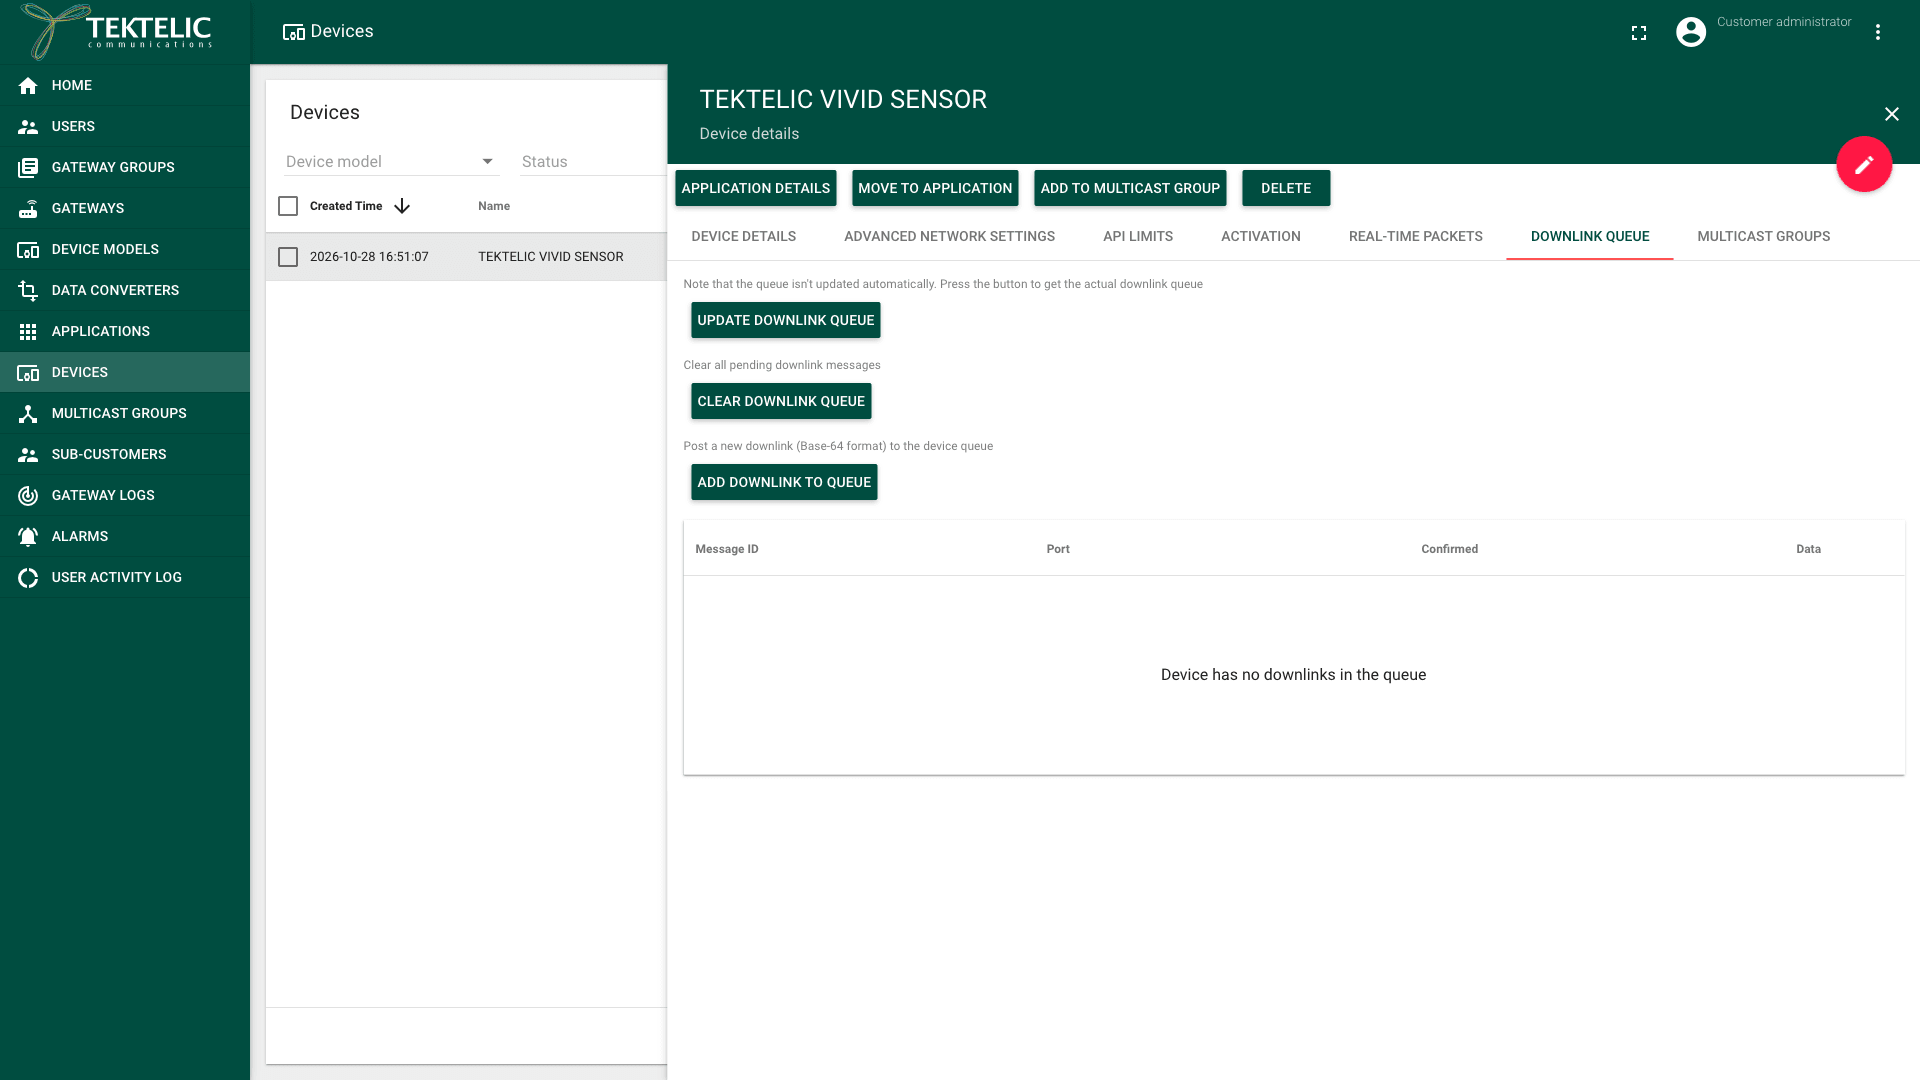
Select the Downlink queue tab. The tab shows the queued downlinks with Message ID, Port, Confirmed and Data. An empty queue shows .
-
Select Add downlink to queue. The downlink form opens below the button.
-
Optional: enter a Message ID, to find the downlink later in the queue and in your own system.
-
Enter the Port. The port is required.
-
Select Confirmed for a confirmed downlink. Leave it cleared for an unconfirmed one.
-
Enter the payload in Data, in Base64. For example, the bytes
01 02areAQI=in Base64. Data is required.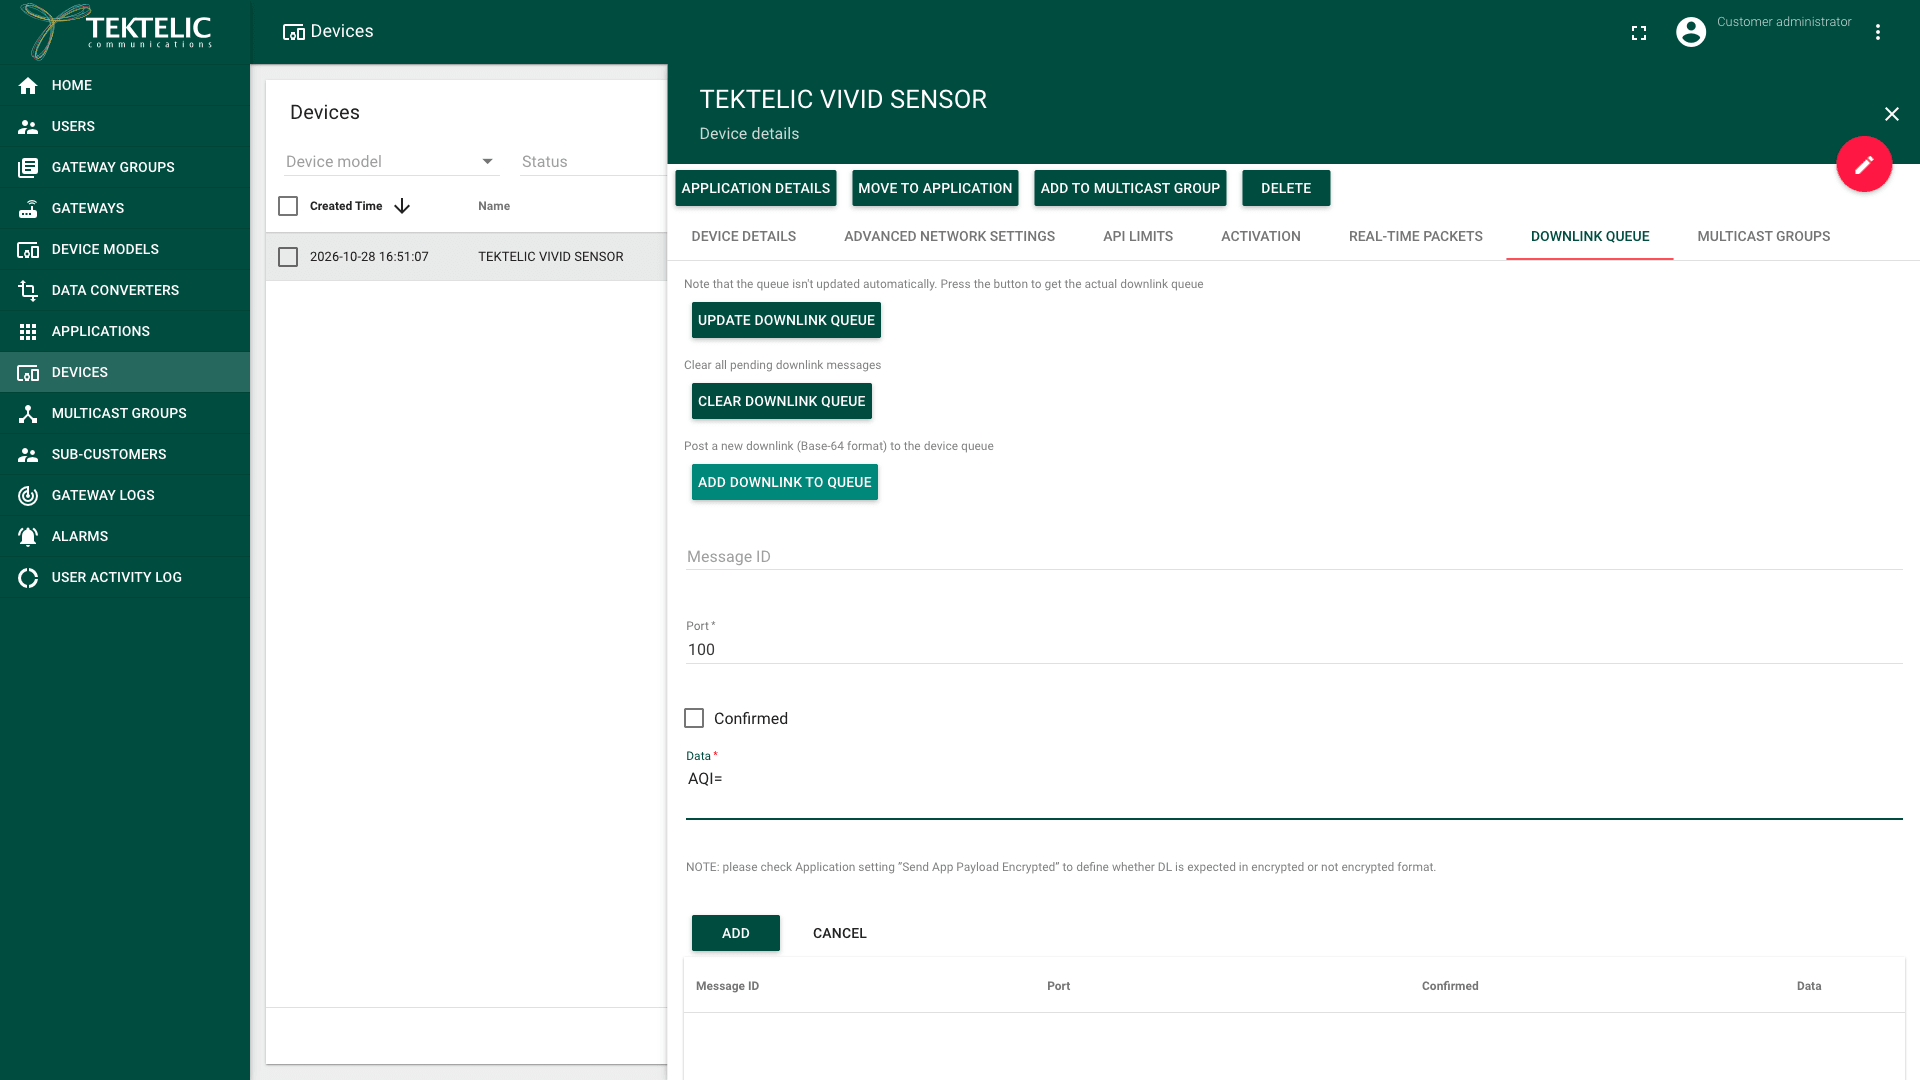
-
Select Add. KONA Core shows , and the downlink appears in the queue table.
You can't add a downlink while the device panel is in edit mode: the Downlink queue tab is hidden then.
When the device receives it
The downlink waits in the queue until the device can receive it. The wait depends on the device class, set on the device model:
| Device class | When the downlink reaches the device |
|---|---|
| Class A | After the device's next uplink, in RX1 or RX2. If the device reports once an hour, the downlink can wait up to an hour. |
| Class B | At the device's next ping slot. |
| Class C | As soon as the device isn't transmitting. |
A Class A device gets at most one downlink per uplink. A queue of 3 downlinks needs at least 3 uplinks. For the classes, see Device Activation & Classes.
Each device has its own queue, with capacity configured through the device settings in the API. When it's full, KONA Core drops the newly added downlink and raises DL_QUEUE_IS_FULL. confirm the exact API parameter for queue capacity and its default value.
To send a downlink to many devices at once, use a multicast group.
Clear the queue
Clear the queue to cancel downlinks that the device hasn't received yet, for example a wrong command.
-
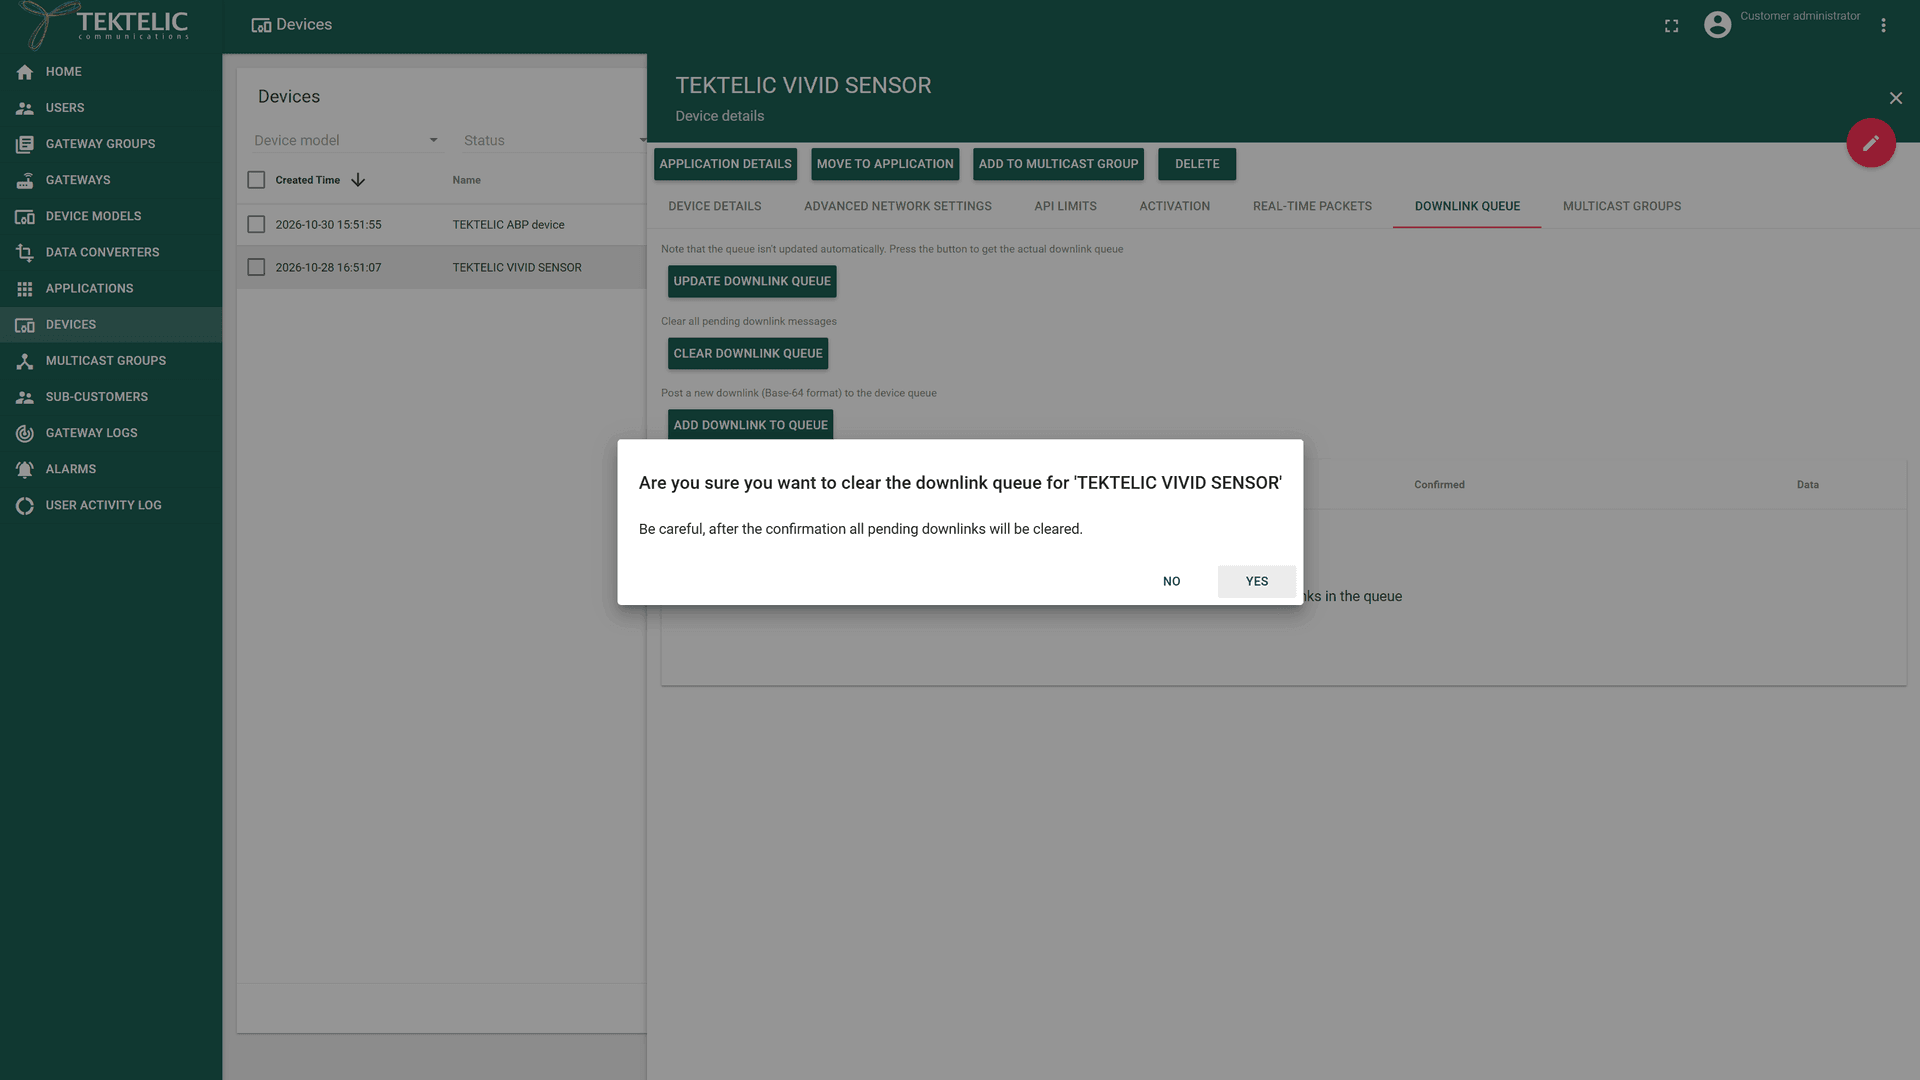
On the Downlink queue tab, select Clear downlink queue. A dialog asks .
-
Select Yes to remove every pending downlink, or No to keep them. You can't remove a single downlink.
To clear the queue each time the device joins again, select Clear downlink queue upon join on the device's Advanced network settings tab. It's cleared by default.
Send from the REST API or an integration
To send downlinks from your own system, use Add downlink to queue. It takes the same values as the UI form: port, confirmed flag, message ID and Base64 data.
To send readable values, such as a JSON command, send them through an integration. The integration's data converter runs an encoder that turns them into bytes. See Write an Encoder and HTTP Integration.
Check the result
- Wait for the device's next uplink, or a few seconds for a Class C device.
- On the Downlink queue tab, select Update downlink queue. The tab doesn't refresh by itself. The sent downlink is gone from the queue.
- Select the Real-time packets tab. The downlink shows Downlink in the Message Type column, with its Port, its FCntDown and C or U in the C/U column.
- Check that the device behaves as the command says, for example a new reporting interval in its uplinks. KONA Core has no separate UI indicator for the device's downlink acknowledgment. C/U shows the message type, not acknowledgment of delivery.
To read the queue from your own system, use Get downlink queue.
Troubleshooting
| Symptom | Likely cause | What to do |
|---|---|---|
| Add stays disabled. | Port or Data is empty. | Enter both. |
| The downlink stays in the queue. | A Class A device hasn't sent an uplink since you added it. | Wait for the next uplink, then select Update downlink queue. If it's still queued after several uplinks, check the device's events on the Alarms page. |
| The device ignores the downlink. | Wrong port, wrong bytes, or an encrypted payload while Send app payload encrypted is cleared. | Check the port and bytes in the device's user guide. Check that the Base64 decodes to the bytes you meant. |
Still stuck? A Sub-Customer contacts their Customer, a Customer contacts their Provider, and a Provider contacts TEKTELIC Support. Send the DevEUI, the time of the downlink in UTC, the port and payload, and a screenshot of the Real-time packets tab.